Views: 0 Author: Site Editor Publish Time: 2025-07-08 Origin: Site


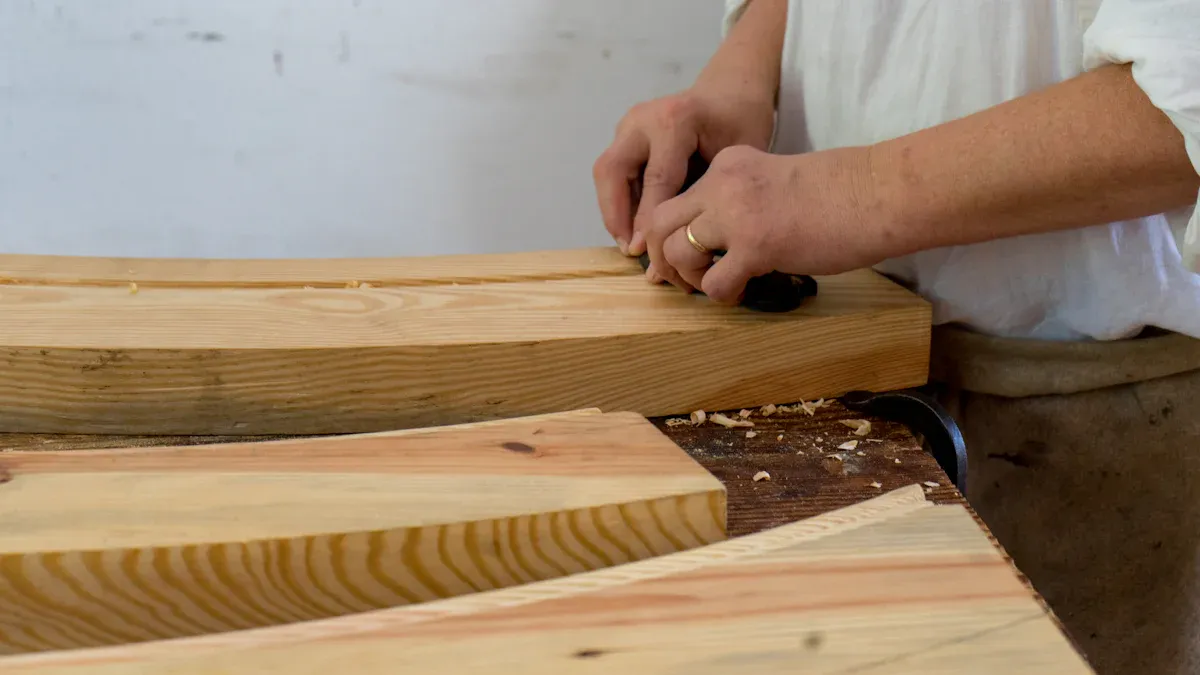
Image Source: pexels
Plywood edge banding gives your project a clean, finished look. This simple strip covers rough plywood edges, making them smooth and strong. You can apply edge banding with basic tools or use a machine for larger jobs. Many people choose plywood edge banding to boost durability and add style. Want your furniture to look sharp and last longer? Start with this easy upgrade!
Pick the best edge banding material. Use PVC if you want it to last and not get wet. Use veneer tape if you want it to look like real wood. Use solid wood if you need it strong or for fancy projects. Sand the plywood edges until they feel smooth. This helps the banding stick well and stay on longer. Measure the edge banding carefully. Cut it a little longer than you need. This way, you can trim it for a perfect fit. Use iron-on edge banding for small jobs. Use glue-on if you want it to hold better. Use machines if you want it done fast and look professional. After you put on the edge banding, trim and sand the edges. This makes them smooth and neat. Always follow safety rules to keep yourself safe while working.
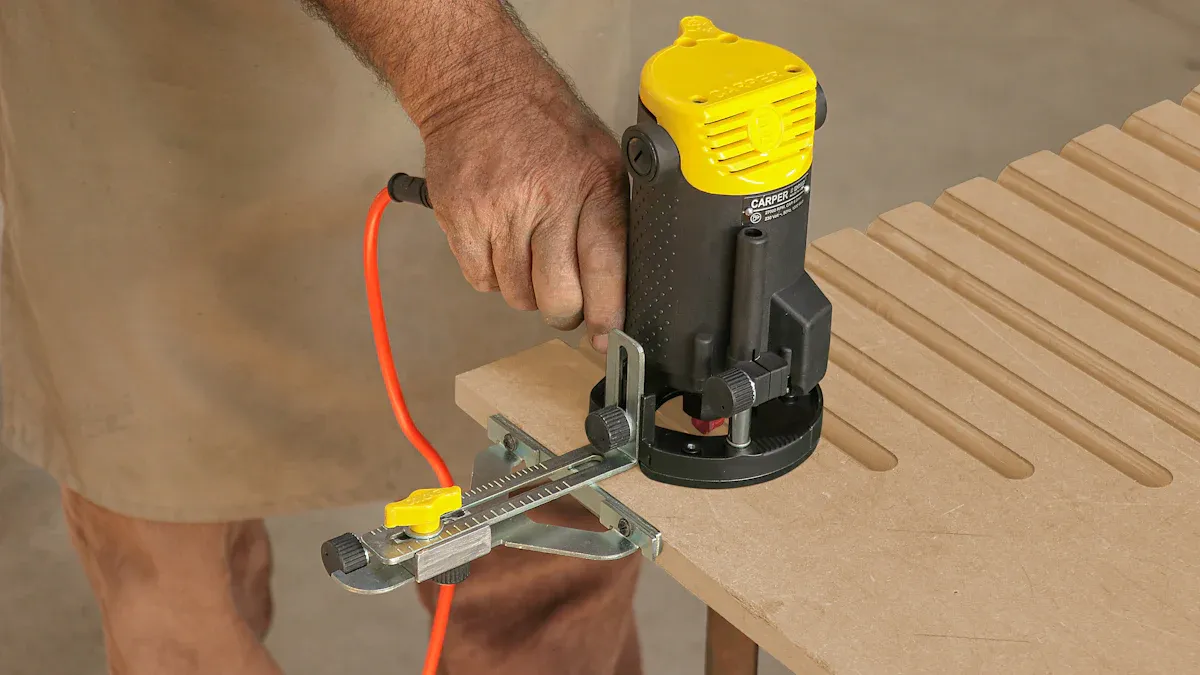
Image Source: unsplash
When you start a plywood edge banding project, you get to pick from a few main materials. Each one has its own strengths, so you can match your choice to your needs and style.
Veneer tape edge banding: This type uses thin slices of real wood. You get a natural look that matches your plywood. Veneer tape edge banding is easy to apply with an iron or glue. It works well for most furniture, but it does not handle heat as well as other options.
PVC edge banding: This is a popular choice for many woodworkers. PVC edge banding is tough, flexible, and comes in lots of colors and finishes. You can use it on straight or curved edges. It stands up to moisture, heat, and daily wear. If you want something that lasts over ten years and needs little care, pvc edge banding is a smart pick. It also matches textures and gloss levels, so your project looks seamless.
Solid wood edge banding: This gives you a thick, sturdy edge. Solid wood is strong and resists chipping. It is great for high-end projects or places that get a lot of use. You might find it harder to bend around curves, but it sticks well and lasts a long time.
Here’s a quick look at how these materials compare:
| Feature/Aspect | PVC Edge Banding | Veneer Tape Edge Banding | Solid Wood Edge Banding |
|---|---|---|---|
| Durability | Excellent | Good | Excellent |
| Moisture Resistance | High | Low | Moderate |
| Flexibility | High | High | Low |
| Color/Texture Options | Many | Natural wood only | Natural wood only |
| Application | Easy, fast | Easy | Harder, needs tools |
| Longevity | 10+ years | 3-5 years | 10+ years |
Tip: If you want a perfect color or texture match, pvc edge banding can be made to fit your exact design. This helps your furniture look like one solid piece.
You do not need fancy tools to get started with veneer tape edge banding or pvc edge banding. Here’s what you should have on hand:
A sharp utility knife or edge trimmer
Sandpaper or sanding block
Measuring tape and pencil
Iron (for iron-on types)
Wood glue (for glue-on types)
Clean cloth for wiping edges
If you plan to do a lot of edge banding, you might want to try a machine. The Zhongyuan Edge Banding Machine makes the job faster and gives you a smooth, professional finish. This machine works with pvc edge banding, veneer, and even solid wood. It feeds, trims, and buffs the edges for you, so you get perfect results every time.
Before you start adding edge banding, you need to get your plywood edges ready. Sanding is the key step here. If you skip this, your edge banding might not stick well or look smooth.
Grab some quality sandpaper and a sanding block. Sand the plywood edge until it feels smooth and clean. This removes any loose fibers and rough spots.
A smooth edge helps the glue or adhesive on your edge banding grab on tight. You want the banding to stay put for years, not peel off after a few months.
After you apply the edge banding, sand the trimmed banding flush with the plywood. This blends the banding into the wood and gets rid of any sharp or uneven spots.
Always sand any overhanging banding until it feels completely smooth. This step makes your project look professional and ready for finishing.
Tip: Sanding isn’t just about looks. It actually helps the edge banding stick better and last longer.
Getting the right fit for your edge banding starts with careful measuring and cutting. If you rush this part, you might end up with gaps or edges that don’t line up.
Roll your edge banding along the plywood edge to measure how much you need. Cut the banding a little longer than the edge. This extra length gives you room to trim for a perfect fit.
Use a sharp utility knife or scissors to cut the banding. Dull blades can tear or crush the material.
Pick edge banding that’s a bit wider than your plywood. This way, you can trim the extra off later for a seamless look.
After you stick the banding on, use a trimming tool or sharp knife to remove the overhang. Work slowly so you don’t nick the plywood.
Smooth out any rough spots with 150-grit sandpaper wrapped around a wood block. This helps round the corners and blend the banding into the plywood.
Note: Always measure twice before you cut. A little extra care now saves you time and frustration later!
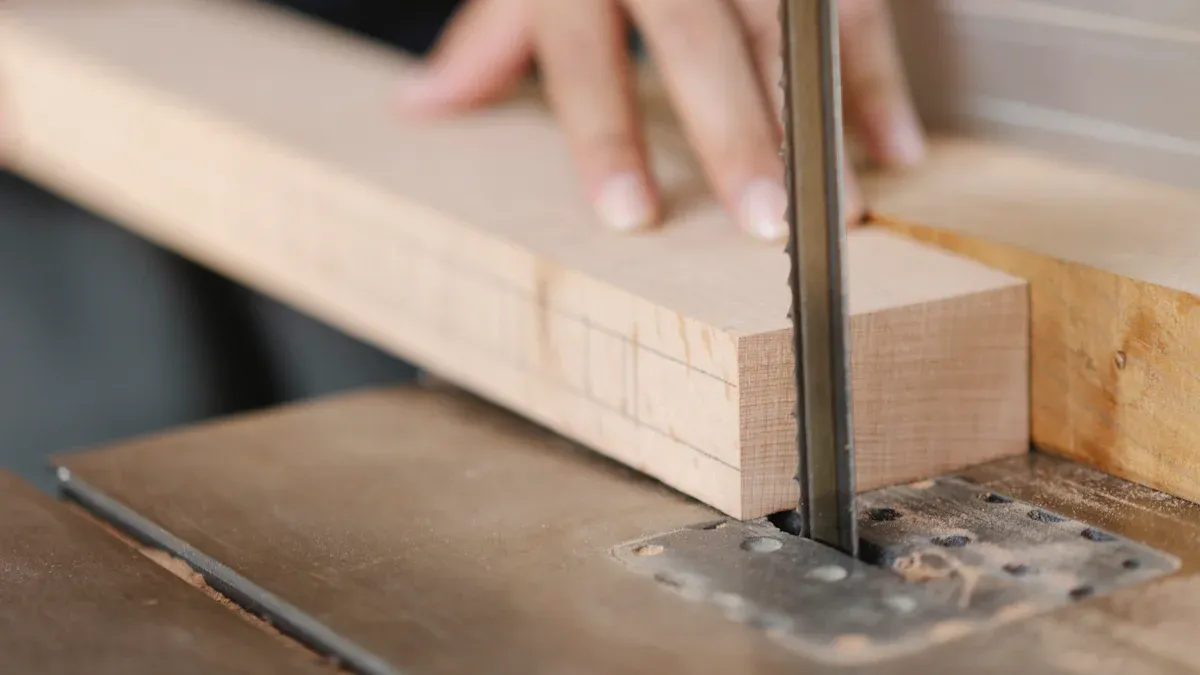
Image Source: pexels
You can start your plywood edge banding project with the iron-on method. This is one of the easiest ways to apply wood edge banding, especially if you are working on a small project or doing it at home. Here are step-by-step instructions to help you get a smooth finish:
Place the edge banding strip along the edge of your plywood. Make sure it hangs over just a bit on each end.
Set your iron to medium heat. If you use too much heat, you might melt PVC banding, so keep an eye on the temperature.
Press the iron on the banding. Move it slowly along the strip. The heat activates the glue on the back of the banding.
Use a wood block or roller to press the banding down while it cools. This helps the heat activated glue stick tight.
Let the banding cool for a few minutes. Then trim the extra banding with a sharp utility knife or edge trimmer.
Sand the edges gently so everything feels smooth and blends with the plywood.
Tip: Iron on edge banding works well for face frame cabinets and small furniture. You can catch any problems early and fix them before the glue sets.
Many woodworkers like this method because it is simple and reliable. When you press the banding properly, you get good adhesion with very few failures. Iron-on edge banding is flexible, so you can use it on straight or curved edges. Just remember, it can take more time than other methods, and you need to watch the heat to avoid damaging the banding.
If you want a stronger bond or need to work on a big project, you might want to glue the edge banding or use a machine. Glue-on methods use wood glue or special adhesives to attach the banding. Here’s how you can do it:
Spread a thin, even layer of glue along the plywood edge.
Press the banding onto the glue. Use clamps or a roller to hold it in place.
Wait for the glue to dry. Check the instructions on your glue for drying time.
Trim the extra banding with a knife or trimmer.
Sand the edges until they are flush and smooth.
Glue-on methods give you a much stronger bond than iron-on. In fact, when you try to remove the banding, you might even pull off some wood fibers! This method is great for high-use furniture or when you want your plywood edge banding to last for years.
For large projects or professional shops, machines make the job faster and more consistent. The Zhongyuan Edge Banding Machine is a top choice for many woodworkers. This machine feeds, glues, trims, and buffs the banding automatically. You can use it with PVC, wood veneer, or solid wood banding. The machine gives you a flawless finish and saves you a lot of time, especially if you have many pieces to do.
Let’s compare some of the main differences between these methods:
| Method | Best For | Bond Strength | Speed | Ease of Use |
|---|---|---|---|---|
| Iron-On | Small projects, DIY | Good | Moderate | Very easy |
| Glue-On | High-use furniture | Excellent | Slower | Easy |
| Machine (Zhongyuan) | Large runs, pro shops | Excellent | Fastest | User-friendly |
Iron-on edge banding is great for flexibility and quick fixes.
Glue-on and machine methods give you a stronger, longer-lasting bond.
Machines like Zhongyuan’s are perfect for high-volume work and deliver a seamless, professional look.
If you want a seamless finish with no visible glue lines, some advanced machines use zero joint edge banding. This method gives you a strong bond, better resistance to heat and moisture, and a smooth look that lasts.
No matter which method you choose, you can apply wood edge banding that looks great and stands up to daily use. Try different techniques to see which one fits your project best!
Once you have your edge banding in place, it’s time to trim the extra material. This step makes your project look neat and professional. You can use a sharp utility knife, an edge banding trimmer, or even a small router for this job. Start by holding your tool flat against the plywood. Work slowly and carefully so you don’t cut into the plywood surface.
Many people like using an edge banding trimmer because it gives you a smooth, even cut. If you use a utility knife, make several light passes instead of one deep cut. This helps you avoid splintering the banding or damaging the plywood. For thick or solid wood banding, a router with a flush trim bit works well. Always check your work as you go. If you see any rough spots, trim them before moving on.
Tip: Trim the ends of the banding first, then the sides. This keeps the corners crisp and clean.
After trimming, you need to sand the edges. Use fine-grit sandpaper wrapped around a sanding block. Sand lightly until the banding feels flush with the plywood. This step blends the banding into the wood and removes any sharp edges.
Now, let’s talk about finishing. Adding a protective finish keeps your edge banding looking great and helps it last longer. Here’s a quick table to show you the best finishing methods:
| Finishing Method Category | Details and Benefits |
|---|---|
| Edge Banding Materials | PVC: Durable, moisture-resistant. ABS: Impact-resistant, eco-friendly. Wood Veneer: Needs sealant. |
| Adhesives | High-quality glue prevents peeling and keeps edges strong. |
| Protective Finishes for Veneer | Sealants protect against moisture and chipping. |
| Maintenance | Gentle cleaning and avoiding sharp impacts keep edges looking new. |
Choose the right finish for your material. Use a clear sealant or lacquer for wood veneer. PVC and ABS usually don’t need extra finish.
Wipe the edges clean before applying any finish.
Let the finish dry fully before using your project.
Note: Regular cleaning and gentle care will help your edge banding stay beautiful for years.
Mistakes can happen when you work on plywood edges. You might see small gaps, bubbles, or spots where the banding did not stick well. Don’t worry! You can fix most problems with a few simple tricks.
Gaps: If you spot a gap between the banding and plywood, try reheating the area with your iron. Press it down with a wood block while it cools. For bigger gaps, fill them with wood filler. Let it dry, then sand it smooth.
Bubbles: Bubbles can pop up if the glue does not stick everywhere. Use a pin to poke a tiny hole in the bubble. Heat the spot with your iron and press it flat.
Loose ends: Sometimes, the ends of the banding lift up. Add a drop of wood glue under the loose part. Press it down with a block until it dries.
Tip: Always check your work as you go. Fixing small problems right away saves you time later.
You want your project to look great and stay safe while you work. Here are some pro tips and safety reminders:
Use a sharp blade for trimming. Dull blades can slip and cause accidents.
Wear safety glasses when you sand or trim. Small pieces can fly up and hurt your eyes.
Work in a well-ventilated area, especially if you use glue or finish.
Never leave oil-soaked rags in a pile. They can catch fire. Lay them flat to dry or store them in a metal container with a lid.
Clean up glue drips right away with a damp cloth. Dried glue is hard to remove and can ruin your finish.
Note: Take your time when you apply edge banding. Rushing can lead to mistakes and injuries.
Try these tips to get a smooth, professional result every time!
You can give your projects a professional touch with plywood edge banding. This simple upgrade boosts durability and lets you customize your look. Try both hand tools and machines like Zhongyuan to see what works best for you. Play around with different materials and finishes for unique results. Take your time, follow safety tips, and enjoy the process. You’ll love how your work turns out!
Press the banding firmly while the glue sets. Make sure you sand the plywood edge before you start. If you see loose spots later, reheat with an iron or add a little wood glue and clamp it down.
You can stain wood veneer edge banding to match your plywood. For PVC or ABS banding, use paint made for plastics. Always test on a scrap piece first to check the color and finish.
Trim the extra width with a sharp utility knife or an edge trimmer. Work slowly and keep your tool flat against the plywood. Sand the edge lightly to blend everything together.
You don’t need fancy tools. A utility knife, sandpaper, and an iron work for most projects. For big jobs, a machine like the Zhongyuan Edge Banding Machine saves time and gives you a pro finish.
Use a pin to poke a small hole in the bubble. Heat the spot with an iron, then press it flat with a wood block. This trick helps the glue stick and smooths out the surface.


