Views: 0 Author: Site Editor Publish Time: 2025-07-03 Origin: Site


If you want to cut mortise and tenon joints with precision, you need the right mortise and tenon machine. Accuracy and safety matter in every woodworking project, especially when you work with mortise and tenon. As a woodworker, you gain the best results when you use advanced equipment. The high-precision CNC mortise and tenon machine allows you to create strong mortise and tenon joints with confidence. Whether you are a beginner or an intermediate woodworker, this method will help you achieve professional-quality woodworking results.
Use a high-precision CNC mortise and tenon machine for accurate and strong joints.
Mark your mortise and tenon carefully with clear layout lines to avoid mistakes.
Secure your workpiece firmly with clamps and position it correctly before cutting.
Follow step-by-step cutting procedures for both mortise and tenon to ensure a perfect fit.
Always wear safety gear and check your machine setup to work safely and efficiently.
You need a reliable mortise and tenon machine to achieve precise joints. The High-Precision CNC Mortise Machine from Shandong Zhongyuan Machinery Co., Ltd. stands out in professional woodworking. This mortise and tenon machine uses precision cylindrical guideways that reduce friction and increase wear resistance. You get smooth spindle movement, which is essential for heavy cutting tasks.
The machine features a PLC control system. You can operate it with stability and accuracy. The pure copper motor delivers strong power, so you maintain consistent results. Adjustable pressing force lets you work with plates of different thicknesses and hardness. You can change drill bits quickly, which saves time and increases flexibility. The dual-table design allows you to process two workpieces at once, boosting your productivity. You can also adjust the tilt angle for complex mortise and tenon joints. This mortise and tenon machine supports a maximum mortise width of 130mm and a depth of 60mm, making it suitable for a wide range of projects.
Tip: Always check the machine’s settings before you start. Proper setup ensures accurate mortise and tenon joints.
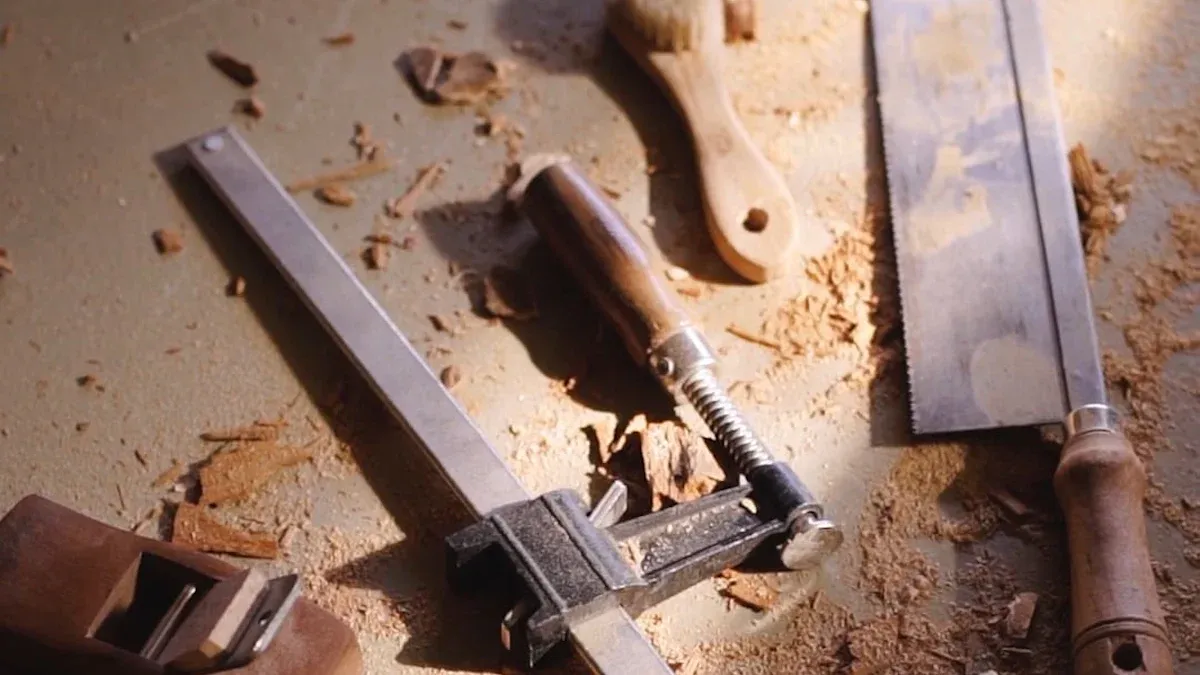
You should gather all necessary accessories before you begin. Use sharp chisels and auger bits for clean cuts. Clamps hold your workpiece steady during machining. Measuring tools, such as rulers and calipers, help you mark out your mortise and tenon locations with precision. Marking tools, like pencils or marking knives, ensure clear layout lines.
Safety matters in every step. Wear safety glasses to protect your eyes from debris. Use hearing protection if the mortise and tenon machine operates at high noise levels. Gloves can protect your hands, but make sure they do not interfere with machine operation. Always keep a dust mask nearby to avoid inhaling fine particles.
Accurate marking sets the foundation for a strong mortise and tenon joint. Begin by selecting the correct face and edge of your workpiece as reference points. Use a sharp marking knife or pencil to draw clear layout lines for both the mortise and the tenon. Always mark the mortise first on the piece that will receive the joint. Then, transfer those measurements to the tenon piece. This method ensures both parts align perfectly when you assemble the joint.
A precise layout helps you avoid mistakes during the cut. Use a combination square or a marking gauge to maintain consistent measurements. Double-check your layout before you proceed. If you notice any errors, correct them immediately. Consistent and careful marking will save you time and material.
Tip: Mark the waste areas with an "X" so you do not accidentally cut into the wrong section.
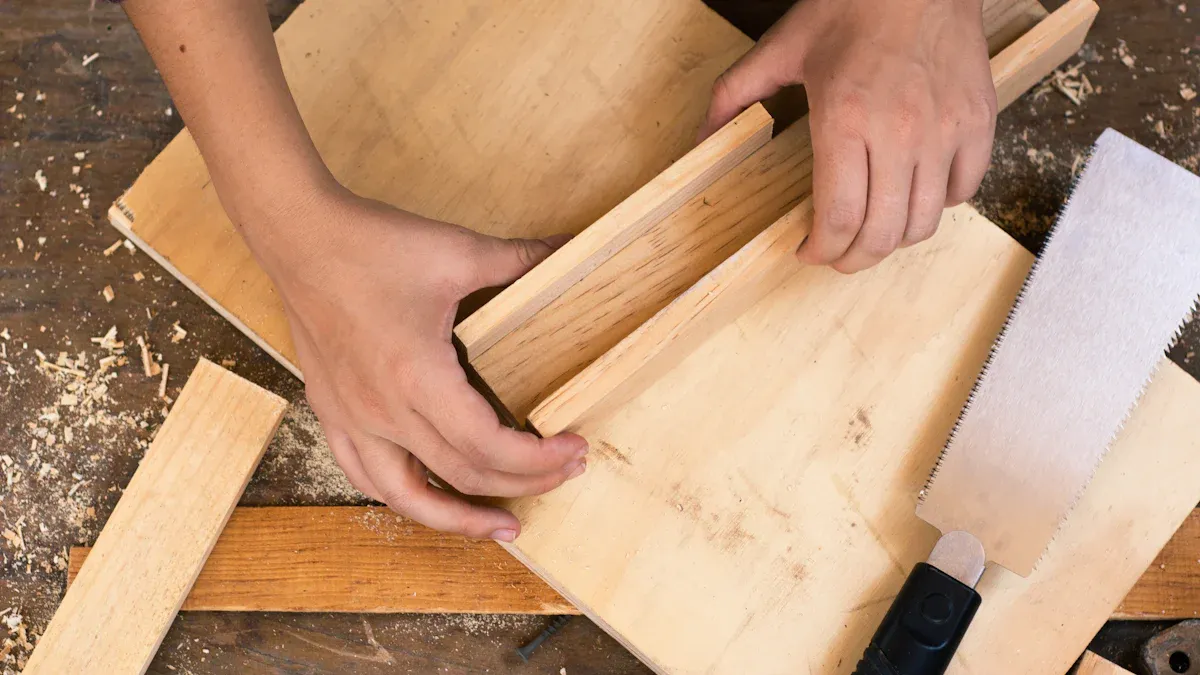
Proper workpiece setup is essential for a clean mortise and tenon cut. Secure your workpiece firmly using clamps. Make sure the surface sits flat against the machine table. This step prevents movement during cutting and keeps your mortise and tenon joint accurate.
Experts recommend maintaining measurement tolerances within 0.002 inches for precise joinery. This level of accuracy ensures your mortise and tenon fit together tightly without gaps. Use calipers or a digital measuring tool to check your setup before you start the machine. Adjust the position if needed to match your layout lines exactly.
Check that the workpiece aligns with the machine’s guides. The mortise should sit square to the table, and the tenon should match the mortise dimensions. Take your time during this step. A careful setup leads to a professional-quality joint and reduces the risk of errors when you cut.
You need to set up your mortise and tenon machine before you start to cut a mortise or cut a tenon. Begin by checking the thickness of your workpiece. Adjust the pressing force on the machine so it holds the wood securely. This step prevents movement and keeps your mortise and tenon joint accurate.
Set the tilt angle if your project requires angled joints. Use the machine’s tilt adjustment system to match your layout lines. Make sure the table sits flat and the guides line up with your markings. You want the mortise and tenon to fit together tightly, so double-check all measurements.
To cut a mortise, select the right bit size. Install the bit and lock it in place. Adjust the depth stop to control how deep you cut a mortise. For the tenon, set the fence and guides to match the width and thickness you marked. Always test the setup on a scrap piece before you cut a tenon or mortise on your actual workpiece.
Tip: Use calipers to check the width and depth after you cut a mortise or cut a tenon. This helps you avoid mistakes and ensures a perfect fit.
Safety comes first every time you use a mortise and tenon machine. Inspect the machine for loose parts or damage. Confirm that all guards and shields are in place. Make sure the spindle sits at a true 90 degrees unless you need an angled joint.
Wear your safety glasses and hearing protection. Keep your hands clear of moving parts when you cut. Secure the workpiece with clamps before you cut a mortise or cut a tenon. Never reach over the bit while the machine runs.
Check the emergency stop button before you begin. You want to react quickly if something goes wrong. Stay focused on your work. A safe setup leads to clean, accurate mortise and tenon joints every time.
Proper positioning and clamping set the stage for a successful mortise and tenon project. You need to secure your workpiece with care before you cut a mortise. Start by placing position locators on the machined surfaces of your wood. This step gives you a stable and consistent reference point. Spread the locators out as much as possible. Wide spacing increases stability and helps you deal with any small irregularities in the wood. Avoid putting locators too close together. If you do, you risk wobbling and lose accuracy.
Do not use extra locators that control the same movement. Redundant locators can cause positioning errors and even damage your workpiece. Keep chips and dust away from the seating area. Design your setup so chips do not build up under the wood. This keeps your mortise accurate and your cuts clean.
Apply the 3-2-1 locating method. Use six locators to restrict nine degrees of freedom. Then, use clamps to control the last three degrees. Place your clamps so the force pushes the workpiece into the locators or strong supports. This prevents the wood from moving or deforming when you cut a mortise.
Choose the right clamp size and force. Base your choice on the cutting forces and friction you expect during the cut. You want the workpiece held tight, but not crushed. Low-profile clamps work best. They stay out of the way and do not interfere with the mortise and tenon machine. Always check for vibration, loading, and stress. Your clamps must hold the wood securely from start to finish.
Select clamp types that spread the force evenly. Rotating pads, strap clamps, or collets all work well. Even pressure keeps your workpiece safe and your mortise precise.
Tip: Double-check your setup before you cut. A secure workpiece leads to accurate mortise and tenon joints every time.
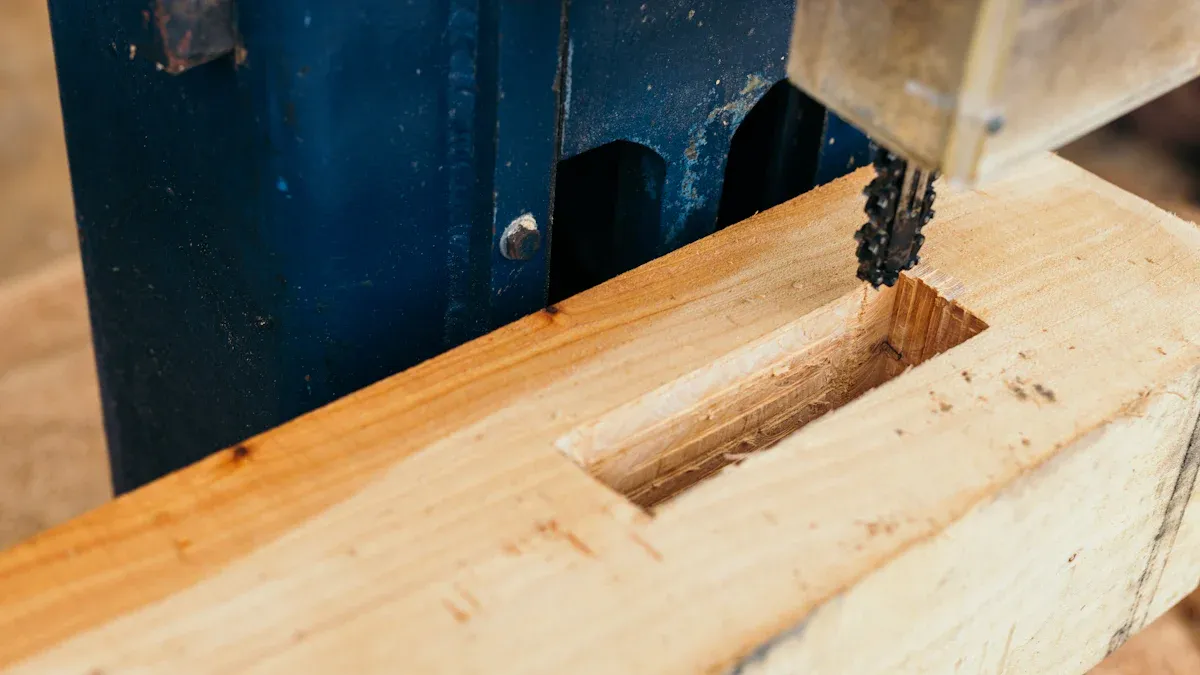
You are ready to cut a mortise once your workpiece is secure. Follow these steps for a clean and accurate mortise:
Set the mortise and tenon machine to the correct depth and width. Use your layout lines as a guide. Adjust the bit so it matches the size of the mortise you marked.
Turn on the machine and let it reach full speed. This ensures a smooth cut and reduces tear-out.
Lower the bit slowly into the wood. Start at one end of the mortise and move along the length. Keep your hands clear of the moving parts at all times.
Cut a mortise in small passes. Do not try to remove too much material at once. Shallow cuts protect the wood and keep the mortise walls smooth.
Move the workpiece or the table as needed to follow your layout lines. Check your progress after each pass. Use a vacuum or brush to clear chips from the mortise.
When you reach the final depth, stop the machine and raise the bit. Remove the workpiece and inspect the mortise. The sides should be straight and the bottom flat.
Use a sharp chisel to square the ends if needed. Some mortise and tenon machines leave rounded ends, so a chisel helps you achieve a perfect fit for your mortise and tenon joint.
Test the fit with the tenon piece. The mortise should hold the tenon snugly without forcing it.
Note: Cutting mortises with a high-precision CNC mortise and tenon machine gives you consistent results. You save time and reduce errors compared to hand-cut methods.
You need to cut a mortise with care and patience. Each cut brings you closer to a strong and reliable mortise and tenon joint. When you follow these steps, you create mortise and tenon joints that stand the test of time.
You need a precise layout before you cut a tenon. Start by measuring the thickness of your mortise. Use this measurement to mark the tenon cheeks on your workpiece. The tenon should fit snugly into the mortise and tenon joint, so accuracy matters. Mark the tenon shoulders at the exact length you want the tenon to extend into the mortise. Use a marking gauge to scribe clear lines for the tenon cheeks, shoulders, and the tenon’s width.
Check your layout against the mortise. The tenon must match the mortise in both width and depth. Mark the waste areas with an "X" to avoid confusion during the cut. Use a sharp pencil or marking knife for crisp lines. Double-check all measurements before you begin to cut a tenon. A careful layout prevents mistakes and saves material.
Tip: Always mark both faces of the workpiece. This ensures you maintain alignment when you cut the tenon and assemble the mortise and tenon joint.
You can cut a tenon with confidence when you follow a systematic approach. The High-Precision CNC Mortise Machine from Shandong Zhongyuan Machinery Co., Ltd. gives you the control and accuracy you need for professional mortise and tenon joints. Follow these steps to achieve a perfect tenon joint:
Secure the Workpiece
Clamp your workpiece firmly to the machine table. Make sure the reference face sits flat and the layout lines are visible. Stability prevents movement and keeps your tenon accurate.
Set Up the Machine
Adjust the fence and guides to match your tenon layout. Select the correct bit or cutter for the tenon width. Set the depth stop to control how much material you remove. Align the machine so the cut follows your layout lines exactly.
Cut the Tenon Shoulders
Begin by cutting the tenon shoulders. Lower the cutter to the marked shoulder line. Make shallow passes to avoid tear-out. Repeat on all sides as needed.
Cut the Tenon Cheeks
Move to the tenon cheeks. Position the cutter at the layout line and make several light passes. Remove waste material gradually. Check the tenon thickness with calipers after each pass. You want the tenon to fit the mortise without forcing it.
Refine the Tenon
Use a sharp chisel to clean up the tenon shoulders and cheeks if needed. Test the fit in the mortise. The tenon should slide in smoothly and hold without gaps. If the fit feels too tight, pare away small amounts until you achieve a snug fit.
Check for Square and Alignment
Place a square against the tenon shoulders. The tenon must sit square to the workpiece for a strong mortise and tenon joint. Adjust as needed before final assembly.
Repeat for Multiple Tenons
If your project requires several mortise and tenon joints, repeat the layout and cutting process for each tenon. Consistency ensures all joints fit together properly.
Note: Cutting tenons with a CNC mortise and tenon machine increases your efficiency and accuracy. You reduce errors and achieve repeatable results on every tenon joint.
You need to cut a tenon with patience and attention to detail. Each step in the process builds toward a strong, reliable mortise and tenon joint. When you follow your layout lines and use the right technique, you create mortise and tenon joints that last for years.
You need to check the fit of your mortise and tenon joint before final assembly. Slide the tenon into the mortise. The joint should move smoothly but not feel loose. A good fit means the tenon enters the mortise with steady pressure and holds without gaps. If you see any space between the tenon and the mortise walls, use a sharp chisel to pare away small amounts of wood. Work slowly and test the fit after each adjustment.
If the tenon feels too tight, do not force it. Remove the tenon and shave a thin layer from the cheeks. Always check both the width and depth of the mortise. Sometimes, a mortise may have a slight taper or rough spot. Clean the mortise with a file or chisel for a better fit. Repeat the process until you achieve a good fit. This step ensures your mortise and tenon joint will be strong and reliable.
Tip: For tips for better mortise and tenon, always mark your layout lines clearly and use sharp tools for every cut. This practice helps you achieve a precise fit every time.
You may encounter issues when fitting mortise and tenon joints. If the mortise is oversized, glue shims to the tenon and trim them for a snug fit. If the tenon is too short, cut a new tenon or adjust the mortise depth. Always check for square alignment. A misaligned joint can weaken the structure.
Follow these tips for better mortise and tenon results:
Inspect the mortise for debris before each fit.
Use clamps to hold the joint together during dry fitting.
Test the joint under light pressure to check for movement.
Staying safe in your workshop is essential. Adhering to recommended troubleshooting and safety practices improves your results and protects you from harm. Studies show that following evidence-based safety guidelines reduces preventable accidents and improves operation safety. These practices include:
Building a strong safety culture in your workspace.
Training your team and improving communication.
Using quality improvement cycles to refine your process.
Engaging everyone involved in the project.
You should always keep your work area clean and your tools in top condition. Wear safety gear and stay alert during every step. Careful troubleshooting and safety habits help you achieve the best mortise and tenon joints and keep your woodworking experience positive.
You can achieve strong mortise and tenon joints by following each step with care. Careful setup, accurate marking, and strict safety practices form the foundation of quality woodworking. Using high-precision machines improves your results and saves time. The table below highlights findings from 27 tested joints, showing how CNC technology and reinforcement boost performance in woodworking:
| Aspect Evaluated | Key Findings |
|---|---|
| Manufacturing Method | CNC technology increased joint strength and consistency |
| Initial Stiffness Increase | 11.4% to 91.8% improvement with reinforcement |
| Moment Carrying Capacity | 13.5% to 41.7% improvement with reinforcement |
Practice your skills with small projects and explore more woodworking resources to keep improving.
You get the best results with hardwoods like oak, maple, or cherry. These woods provide strength and hold tight tolerances. Softwoods can work, but you may see more wear over time.
Clean the machine after each use. Lubricate moving parts regularly. Check for loose bolts and worn bits. Follow the manufacturer’s maintenance schedule to keep your machine running smoothly.
Yes, you can. The High-Precision CNC Mortise Machine offers tilt angle adjustment. You set the desired angle, secure your workpiece, and cut precise angled joints for advanced woodworking projects.
Safety glasses
Hearing protection
Dust mask
You protect your eyes, ears, and lungs from debris and noise. Always keep safety gear on during every step of the process.


