Views: 0 Author: Site Editor Publish Time: 2025-07-02 Origin: Site


Making a mortise and tenon joint means you cut a mortise, which is a hole, and a tenon, which is a tongue, so they fit together tightly. When you use a mortise and tenon machine, you achieve high precision and repeatability. Studies show that mortise and tenon joints, especially those made with CNC machines, provide excellent stiffness and strength for woodworking. Many experts report that CNC fabrication increases joint strength and reliability, making your projects more accurate and efficient.
Choose solid wood and reliable tools to build strong mortise and tenon joints.
Mark your mortise and tenon carefully to ensure a perfect fit and avoid mistakes.
Use a high-precision mortise and tenon machine for accurate, repeatable cuts and better efficiency.
Cut the mortise first, then shape the tenon to fit snugly without forcing it.
Test fit, fine-tune, glue, and clamp your joint carefully to achieve strong, lasting results.
Selecting the right materials and tools sets the foundation for a strong mortise and tenon joint. You should always choose solid wood for your project. Solid wood provides the durability and strength needed for a reliable mortise. Proper joint design and fitting also play a crucial role in the longevity of your work.
For tools, you want accuracy and reliability. The following table highlights some of the most trusted options for mortise joinery:
| Tool Name | Type | Key Features and Reliability Factors |
|---|---|---|
| Starrett 4" Double Square | Measuring Tool | Removable and lockable head, narrow blade fits tight spaces, highly precise for layout and marking. |
| Suizan Japanese Pull Saw | Saw | Versatile for fine cuts, ideal for joinery, recommended by experts, known for precision and durability. |
| Pfiel Chip Carving Knife | Marking Knife | Excellent for precise layout marking, easy to sharpen, trusted for accuracy in joinery preparation. |
You may also use power tools such as hollow-chisel mortisers or drill presses. These machines offer efficiency and accuracy when you set them up correctly. Always keep your tools well-maintained to avoid issues like jamming or overheating during mortise cutting.
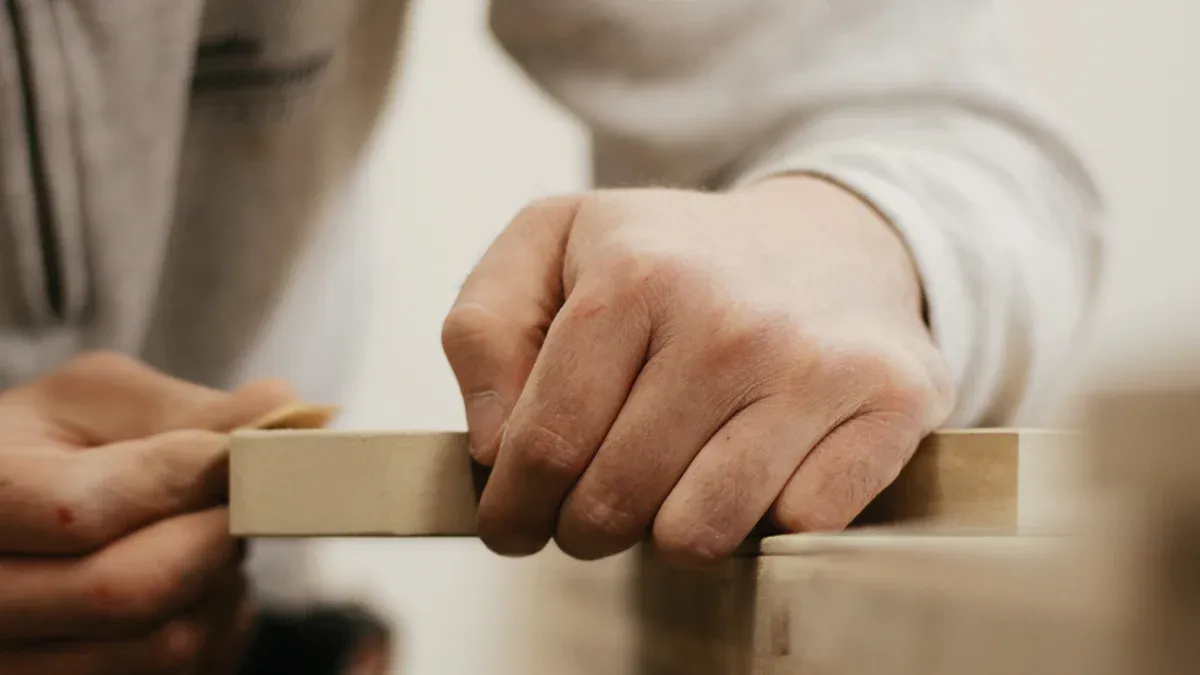
Accurate marking ensures your mortise and tenon joint fits perfectly. Begin by measuring and marking the mortise location on your workpiece. Use a high-quality marking knife, such as the Pfiel chip carving knife, to score clean, crisp lines. This step helps prevent the wood fibers from tearing when you cut the mortise.
A double square, like the Starrett 4" model, allows you to mark precise mortise boundaries. Set the width of the mortise to match the thickness of the tenon for a snug fit. Mark both the mortise and tenon locations before you start cutting. Consistent marking on all pieces guarantees that your mortise and tenon joints align during assembly.
Tip: Always double-check your measurements before making any cuts. Careful marking saves time and reduces errors in your woodworking projects.
When you want to achieve the highest level of precision in woodworking, you should consider using a mortise and tenon machine. The High-Precision CNC Mortise Machine from Shandong Zhongyuan Machinery Co., Ltd. stands out as a top choice for professionals. This advanced equipment offers features that make your work more accurate and efficient. With a PLC control system, you get stable and repeatable results. The dual-table design allows you to process two workpieces at once, which increases your productivity. You can change drill bits quickly, so you can adapt to different mortise sizes without losing time. The machine also supports angled cuts, giving you flexibility for complex joinery.
Proper setup is the foundation for a successful mortise. Start by marking the center of the mortise on your workpiece. Use a precise marking knife and a reliable square to ensure your lines are straight and clear. Align the workpiece with the guides on the mortise and tenon machine. Make sure the stock sits flat and square against the table. Use stop jigs or fences to keep each piece in the same position for repeat cuts. This step is crucial if you need to make multiple mortises with identical dimensions.
Before you begin, check that the pressing device applies the right amount of force. The High-Precision CNC Mortise Machine lets you adjust the pressing force to match the thickness and hardness of your material. This feature helps prevent movement during cutting and ensures a clean mortise. Always confirm that the spindle and guides move smoothly. The machine’s precision cylindrical guideways reduce friction, which helps you achieve accurate results every time.
Tip: Double-check your setup before you start. A small mistake in alignment can affect the fit of your mortise and tenon joint.
Once you finish the setup, you can cut the mortise with confidence. The High-Precision CNC Mortise Machine delivers outstanding accuracy. Positioning accuracy can reach up to ±0.05mm, and repeat positioning accuracy is as precise as ±0.02mm. The straightness error stays within ≤0.03mm per 300mm. These numbers mean you get mortises that fit tightly and consistently. The fit clearance achievable by CNC machining is as low as 0.08mm, which is much more precise than traditional methods.
To cut the mortise, select the correct drill bit and set the spindle speed. The machine’s spindle runs at 10,000 rpm, which allows for smooth and clean cuts. Adjust the mortise width and depth according to your project needs. The maximum mortise width is 130mm, and the depth can reach 60mm. The thickened frame keeps the machine stable, even during heavy cutting.
You should always follow safety guidelines when operating the mortise and tenon machine. Wear safety glasses and keep your hands clear of moving parts. Set the machine to match the type of wood you are using. Hardwoods may require slower feed rates, while softwoods can handle faster speeds. The adjustable pressing device helps you avoid errors caused by material movement.
Note: Take your time to monitor the process. If you notice any vibration or irregular noise, stop the machine and check the setup.
By following these steps, you ensure that each mortise you cut will fit perfectly with its tenon. The advanced features of the High-Precision CNC Mortise Machine help you achieve professional results, whether you are making a single joint or producing many pieces for a large project.
You need to start by laying out the tenon with precision. Accurate layout ensures a strong joint and a professional appearance. Use a marking gauge to define the tenon’s width and shoulders. The tenon thickness should measure about one-third to one-half the thickness of your mortised workpiece. Mark both faces and edges so you have clear guidelines when you cut the tenon. Always cut the mortise first, then size the tenon to fit. This approach helps you achieve a snug fit without gaps.
Here is a quick reference table for sizing and fitting:
| Specification Aspect | Recommended Measurement/Guideline |
|---|---|
| Tenon Thickness | About 1/3 to 1/2 the thickness of the mortised workpiece |
| Tenon Length | About 1/2 to 2/3 the width of the mortised workpiece |
| Mortise Depth Clearance | Leave about 1/16 inch clearance from mortise depth for glue |
| Fit | Snug fit without forcing; tenon should slide in smoothly |
| Shoulder | Cut adjacent shoulders to hide mortise and improve appearance |
| Mortise Cutting Sequence | Cut mortise first, then fit tenon to it |
Tip: Practice your layout on scrap wood before working on your final piece. This step helps you improve your accuracy and confidence.
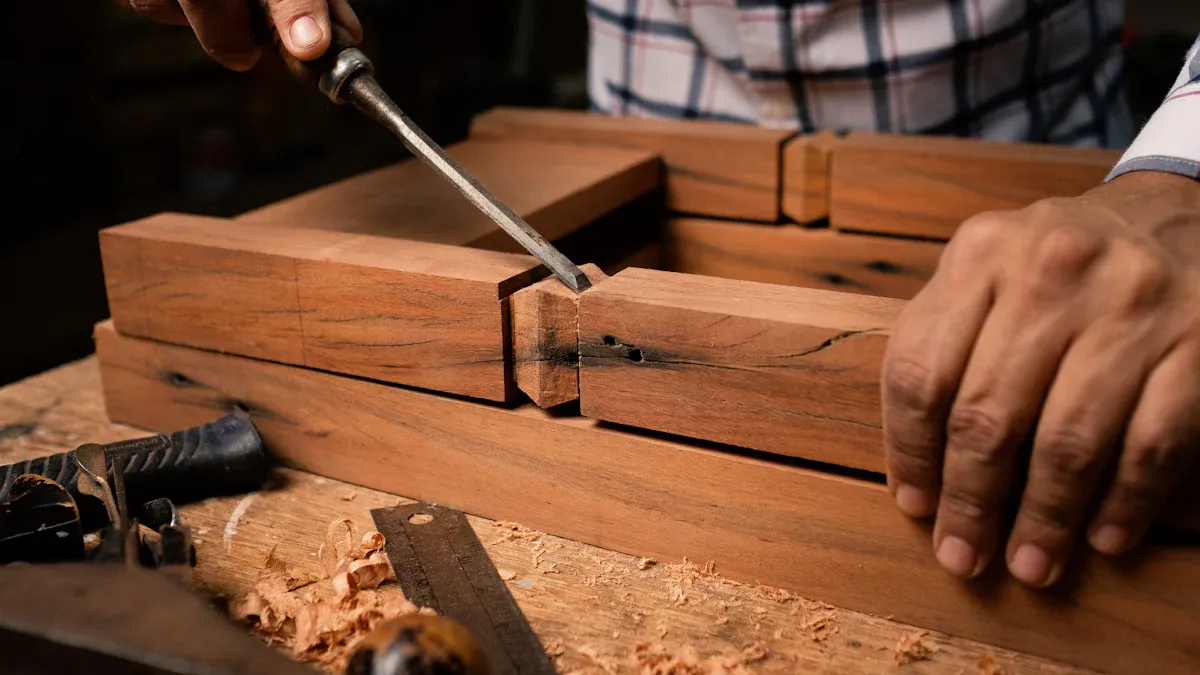
You can cut the tenon using a table saw, a router table, or hand tools. Start by sawing just outside your marked lines. This method gives you room to fine-tune the tenon for a perfect fit. Use a sharp chisel to clean up the tenon’s cheeks and shoulders. Clean shoulders help hide the joint and improve the look of your woodworking project. Test fit the tenon into the mortise. The tenon should slide in smoothly but not feel loose. If the tenon feels too tight, pare away small amounts with your chisel until you achieve a snug fit.
Follow these steps for best results:
Mark the mortise and tenon locations with a marking gauge.
Cut the tenon slightly oversized.
Refine the tenon with hand tools.
Test fit and adjust as needed.
Leave a small clearance at the mortise’s end for glue.
Practice on scrap wood to master your technique.
You will find that careful attention to detail when you cut the tenon leads to stronger, cleaner woodworking joints.
You should always test fit your mortise and tenon before final assembly. This step helps you catch any misalignment early. Place the tenon into the mortise and check for a snug fit. The joint should slide together smoothly without forcing. If you notice resistance or gaps, stop and inspect the fit.
Applying a 5 mm chamfer at a 45-degree angle on the mortise edges, along with chamfering the smaller sides of the tenon, can make a big difference. This technique reduces the risk of blocking and helps guide the tenon into the mortise, even if there is a slight misalignment. Studies show that this approach allows you to use a smaller offset parameter of 0.10 mm instead of 0.20 mm, which decreases friction and improves insertion. You will find that this method leads to better alignment and less chance of damaging the joint during assembly.
Tip: Always check that the joint sits square. Use a try square to confirm that your workpieces meet at the correct angle.
If the tenon feels too tight or does not seat fully, you need to fine-tune the fit. Use a sharp chisel or a shoulder plane to carefully pare down the tenon cheeks. Remove small amounts of material and test the fit after each adjustment. The goal is a tenon that slides into the mortise with light hand pressure but does not wobble. Avoid removing too much material, as a loose joint will not hold up under stress.
Check the shoulders of the tenon as well. Clean, square shoulders help hide the mortise and give your project a professional look. Take your time during this step. Precision here ensures a strong, long-lasting joint.
When you are satisfied with the fit, you can move on to gluing and clamping. Use a high-quality wood adhesive, such as a 40% solid content polyvinyl acetate glue. This type of adhesive has proven to deliver excellent strength in mortise and tenon joints. Apply glue evenly to both the mortise walls and the tenon surfaces.
After applying glue, assemble the joint and clamp it firmly. Make sure the joint remains square as you tighten the clamps. The following table shows the average bending moment capacity for mortise and tenon joints in different wood species, demonstrating the importance of proper gluing and clamping:
| Wood Species | Average Bending Moment Capacity (Nm) | Standard Deviation (Nm) |
|---|---|---|
| Red Oak | 353 | 48 |
| White Oak | 358 | 62 |
Proper adhesive and clamping techniques help you achieve these strength values. Leave the joint clamped until the glue cures fully. This step ensures maximum structural integrity for your finished project.
Note: Wipe away excess glue before it dries to keep your work clean and professional.
You can achieve strong, reliable mortise and tenon joints by following each step with care and using advanced machines for precision. Careful setup and accurate cuts lead to better results and greater efficiency. The benefits of precision extend beyond woodworking. For example, engineers have used mortise and tenon inspired designs to improve energy absorption and durability in aerospace and automotive structures.
| Performance Indicator | Description | Quantitative Outcome |
|---|---|---|
| Crashworthy design | Mortise and tenon inspired energy absorbers in composite fuselage structures | Maintained structural integrity under impact |
| Acoustic absorption | Modified honeycomb panels with mortise and tenon joints | Resonance frequency decreased by 10% |
Always dry-fit your joint before gluing. Take your time and practice with your machine’s features to master joinery.
You achieve unmatched precision and repeatability. The machine allows you to create joints with tight tolerances, which improves strength and appearance. You also save time on repetitive tasks.
You should match the mortise width to one-third or one-half the thickness of your workpiece. Always cut the mortise first, then size the tenon for a snug fit.
Yes, you can. The machine supports inclination processing at various angles. You adjust the tilt angle system for accurate angled mortises, which helps with complex joinery projects.
Always wear safety glasses and keep hands away from moving parts. Check that your workpiece is secure before starting. Follow the manufacturer’s guidelines for setup and operation.
Apply glue evenly to both the mortise and tenon surfaces. Clamp the joint firmly and keep it square. Wipe away excess glue before it dries for a clean finish.


