Views: 0 Author: Site Editor Publish Time: 2025-06-23 Origin: Site


If you want smooth, beautiful wood projects, sanding wood is your secret weapon. When you learn how to sand wood, you turn rough boards into something special. You do not need fancy skills—just the right steps and a little patience. Many people in North America have seen their project success rates rise because they use the proper sanding process. This beginner's guide will help you get there, too.
Mastering sanding wood makes your work look professional.
Using the right tools and grit order leads to better results and more satisfaction.
Always get your workspace ready and put on safety gear like masks and goggles. This keeps you safe from dust and injuries. Use the right sandpaper and follow the correct grit order. Start with rough grit and move to smoother grit for a nice finish. Sand in the same direction as the grain. Use even pressure. Check your work often by touching and looking at the wood. Clean off dust between sanding steps. This keeps the wood clean and helps finishes stick better. Do not skip grits or sand against the grain. Do not press too hard or sand too much. This helps you get great results.
When you start a woodworking project, you want your final piece to look and feel great. Sanding wood helps you get there. You remove rough spots, scratches, and marks from the surface. This step makes your project smooth and ready for paint, stain, or varnish.
You get a uniform surface that absorbs finish evenly.
You avoid ugly blotches or streaks in your paint or stain.
You make the wood safer to touch by removing splinters.
You help finishes stick better, so they last longer.
Did you know? Many woodworkers use a step-by-step sanding process, starting with coarse sandpaper and moving to finer grits. This method gives you the best results. Factories and pros use special machines and even robots to make sure every piece gets the same smooth finish. They also use dust collection systems to keep the air clean and prevent dust from ruining the finish.
Sanding wood is not just about looks. It also protects your project. When you sand properly, you help the finish last longer and keep the wood strong.
Skipping sanding might seem like a time-saver, but it can cause big problems.
Your finish may look uneven or patchy.
Dust and rough spots can get trapped under paint or stain.
The surface might feel rough or scratchy, even after finishing.
You could see swirl marks or scratches that stand out.
Tip: If you skip sanding or rush through it, you risk ruining all your hard work. Even the best paint or stain cannot hide a poorly sanded surface.
Manufacturers use special tools and even computers to check for sanding mistakes. They know that a smooth surface means fewer defects and better results. You can get pro-level results at home by taking your time and following each sanding step.
Before you start sanding, you need to protect yourself. Sanding wood creates fine dust that can harm your lungs and skin. You also risk cuts and eye injuries if you skip safety steps. OSHA, the main safety agency in the U.S., says woodworkers face dangers like cuts, breathing problems, and even cancer from wood dust. They recommend using personal protective equipment (PPE) every time you sand.
Here’s what you should wear:
Safety glasses or goggles to keep dust and splinters out of your eyes.
A dust mask or, even better, a NIOSH-approved respirator for sanding dust protection.
Hearing protection if you use power sanders.
Gloves to prevent cuts and splinters.
Long sleeves and pants to protect your skin.
Tip: Training and good habits help you remember to use your safety gear. Studies show that people who get safety training use their PPE more often and avoid injuries.
A good workspace makes sanding easier and safer. You want to keep your tools and materials organized so you don’t waste time searching for things. Experts suggest these steps for setting up your sanding area:
Plan your workflow. Think about how you move wood through your space.
Keep tools you use together close to each other.
Place your workbench near a window for natural light.
Store wood near the entrance for easy access.
Put cutting tools near the wood storage.
Keep clamps and assembly tables within reach.
Make sure you have enough space around your table saw and workbench.
Clean up dust and scraps often to prevent slips and fire hazards.
Natural light helps you spot rough spots and dust you might miss under artificial lights.
Getting your wood ready before sanding saves you time and gives you better results. Start by checking for cracks, holes, or glue spots. Fill any gaps with wood filler and let it dry. Remove extra glue, especially in joints, because leftover glue can block stain and ruin your finish.
Follow these steps for best results:
Sand before you assemble furniture to keep corners and joints flush.
Start with medium grit sandpaper (120-150 grit).
Always sand with the grain to avoid scratches.
Move to finer grits (up to 220) for a smooth finish.
Pay extra attention to end-grain areas—they soak up more stain.
Remove all sanding dust with a vacuum or tack cloth before finishing.
Run a clean sock over the wood. If it snags, you need to sand more.

When you walk into a hardware store, you might feel overwhelmed by all the types of sandpaper on the shelves. Each type works best for certain jobs. You want to pick the right one for your project. Here are the most common types of sandpaper you’ll see:
Aluminum Oxide: This is tough and lasts a long time. You can use it for wood, metal, and even paint.
Garnet: This natural sandpaper wears down smoothly. It’s great for hand-sanding wood.
Ceramic: Super hard and strong. You use this when you need to remove a lot of material fast.
Silicon Carbide: This one works for sanding finishes and can be used wet or dry.
Stearated Sandpaper: It has a special coating that keeps it from clogging up with dust.
You’ll also notice open coat and closed coat types of sandpaper. Open coat has more space between the grits, so it clogs less and lasts longer. Closed coat has more grit packed together, which makes it cut faster but clog sooner.
Tip: Brands like Norton, Mirka, Klingspor, and 3M make high-quality types of sandpaper. Some, like Mirka Abranet, last longer and resist clogging.
Grit numbers tell you how rough or smooth the sandpaper feels. Lower numbers mean bigger, rougher particles that remove wood quickly. Higher numbers mean smaller, finer particles that make the wood smooth. For example, a 40-grit sandpaper will take off a lot of wood fast but leave scratches. A 400-grit sandpaper will make the surface feel silky smooth.
| Sandpaper Grade | Grit Size (CAMI) | Typical Use/Application |
|---|---|---|
| Extra Coarse | 24, 36 | Removing lots of material, rough shaping |
| Coarse | 40, 60 | Stripping paint, heavy sanding |
| Medium | 80, 100, 120 | Smoothing rough wood, prepping for finish |
| Fine | 150, 180, 220 | Final sanding before finishing |
| Very Fine | 240, 320, 400 | Sanding between coats, polishing |
| Super Fine | 600 and up | Polishing finishes, ultra-smooth surfaces |
You want to start with a lower grit to remove rough spots, then move up to higher grits for a smooth finish. The numbers matter because each step removes the scratches from the last one.
You might wonder, “Can I skip grits to save time?” The answer is no. You should follow a grit sequence to get the best results. Here’s how you do it:
Start with a coarse grit to remove roughness or old finish.
Move to a medium grit to smooth out the scratches from the coarse grit.
Finish with a fine grit for a silky surface.
Each grit removes the marks left by the one before it. If you skip a step, you might see swirl marks or blotchy spots after you finish. The golden rule says never skip more than one grit size. For example, don’t jump from 80 to 180. Go from 80 to 120, then to 180 or 220.
Note: Following the right grit sequence helps your stain or paint look even and professional. Testing on scrap wood can help you see how the final grit affects the finish.
Using the right types of sandpaper and following the correct grit sequence makes sanding easier and your project look amazing. You’ll notice the difference right away!
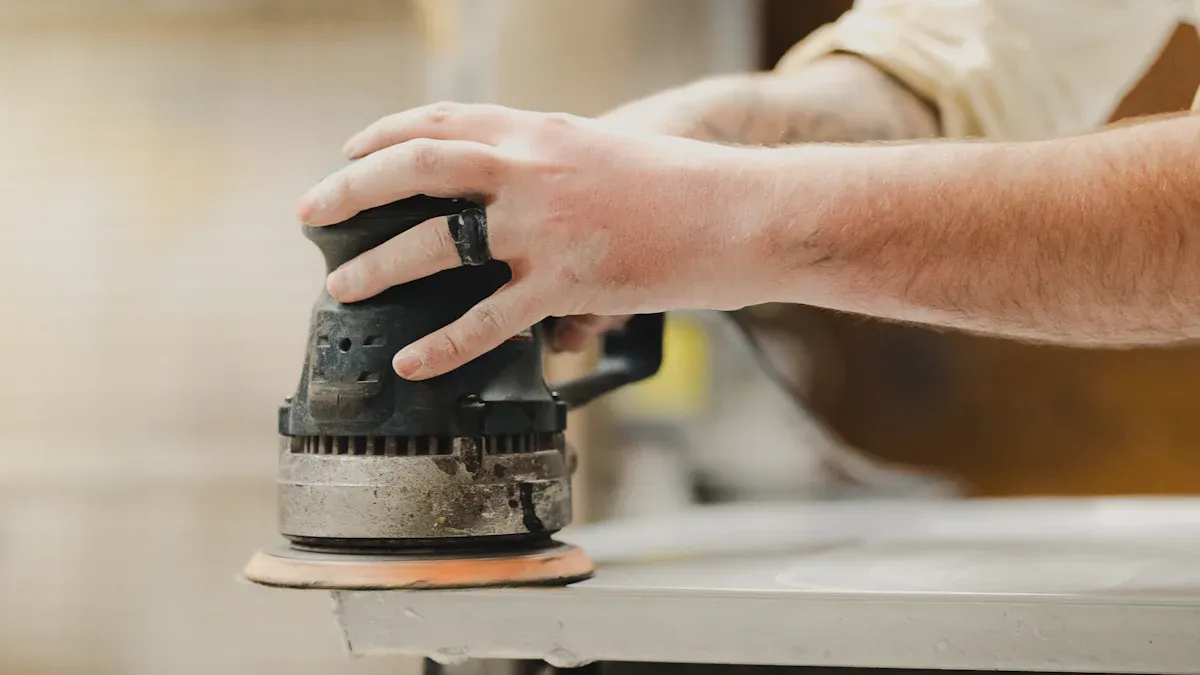
Image Source: pexels
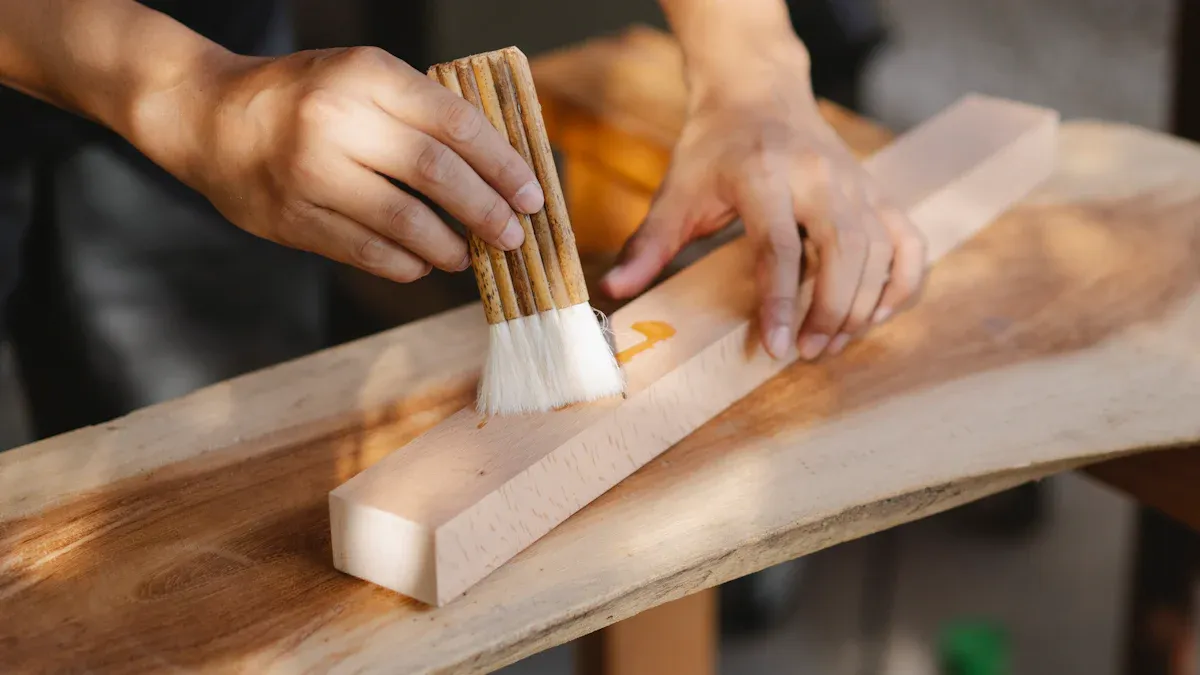
Manual tools give you a lot of control when you sand wood. You can use sanding blocks, sanding sponges, or just a piece of sandpaper in your hand. These tools work well for small projects, corners, or when you want to avoid removing too much material. Many woodworkers like to finish their projects by hand because it helps them catch small flaws and get a super smooth surface. You can feel the wood as you work, which makes it easier to spot rough spots.
Tip: Hand sanding is great for delicate areas and final touches. You can also use it between coats of finish for the best results.
Power sanders make wood sanding faster and easier, especially for big surfaces. You can choose from several types, like random orbital sanders, belt sanders, and detail sanders. Each one has its own job. For example, a belt sander removes lots of material quickly, while a random orbital sander gives you a smooth finish without leaving swirl marks. In professional shops, many people use pneumatic sanders because they offer better speed control and collect dust more effectively. Electric sanders work well when you do not have access to air power, such as on job sites.
Some experts say the real difference between sanders is small. The way you use the tool, the sandpaper grit, and your technique matter more than the tool itself. You can get great results with either manual or power tools if you follow the right steps.
Choosing the right tool depends on your project size, your budget, and your comfort level. If you work on small projects or want to focus on detail, manual tools might be your best bet. For larger jobs, power sanders save you time and effort. Some sanding belts, like the LS 309 XH, last longer and remove more material than others, which can save money in the long run. Shops often track how long their sanding belts last to cut costs and reduce downtime.
Remember: The best results come from using the right tool for the job and following a good sanding process. Your method and materials matter more than the tool you pick.
No matter what you choose, always check your progress as you go. Good wood sanding comes from patience, practice, and the right tools for your needs.
Learning how to sand wood is all about following the right steps and paying attention to detail. If you want a smooth finish that looks professional, you need to take your time and check your work as you go. Here’s a step-by-step guide to help you master the sanding process, even if you’re just starting out.
Before you begin, take a close look at your wood. Check for any nails, staples, or glue spots. These can damage your sandpaper or leave marks on your project. Use a brush or vacuum to remove dust and debris from the surface. Clean wood helps your sandpaper work better and lets you see what needs attention.
Tip: Always start with a clean surface. Dust and dirt can scratch the wood and make sanding harder.
It’s easy to lose track of where you’ve sanded, especially as the wood gets cleaner. To help you see your progress, lightly draw pencil lines across the surface. As you sand, the lines disappear, showing you which areas still need work. This simple trick makes sure you don’t miss any spots and helps you get an even result.
When you use this marking method, you can spot areas that need more attention. Beginners find this especially helpful because it takes the guesswork out of the sanding process.
Now it’s time for initial sanding. Choose your starting grit based on the wood type and how rough the surface feels. For soft woods like pine, you can start with a very coarse grit, such as P40. For hardwoods, begin with a medium or coarse grit, like P60 or P80. If the wood is already pretty smooth, you might start with P100 or P120.
Using a coarse grit removes rough spots, old finishes, and big scratches. Don’t use a fine grit for initial sanding because it won’t take off enough material. Remember, coarse grits work fast but can leave scratches, so you’ll need to follow up with finer grits.
Statistically, each pass with coarse sandpaper only removes about 15–20% of the material. That means you need to be patient and let the sandpaper do the work. If you use too coarse a grit on hard or mixed woods, you might gouge the surface, so pick your grit carefully.
After initial sanding, switch to a medium grit, like P100 or P120. Sand the whole surface again, removing the scratches left by the coarse grit. Then, move up to a fine grit, such as P180 or P220, for your final sanding. This step smooths out the wood and gets it ready for finishing.
For most projects, stopping at P180 or P220 before staining gives you the best results. If you want an extra-smooth finish, you can go even higher, but don’t skip grits. Move up in steps, increasing the grit size by about 50% each time. This method helps you avoid swirl marks and keeps the surface even.
How you sand matters just as much as what you use. Always sand with the grain of the wood. This means moving your sandpaper in the same direction as the wood fibers. Sanding against the grain can leave scratches that show up after you finish the project.
Use even pressure as you sand. Pressing too hard can create dips or uneven spots. Let the sandpaper do the work. If you use a power sander, keep it moving and don’t stay in one place for too long.
Here are some sanding techniques that help you get a smoother surface:
Sand with the grain, not against it.
Use long, even strokes.
Overlap your passes to cover the whole area.
Check your progress often.
Performance tests show that using the right sanding techniques and grit sizes leads to less roughness, better adhesion for finishes, and fewer surface imperfections. When you follow these steps, your wood will look and feel much better.
After each sanding step, stop and remove the dust. Use a vacuum, brush, or tack cloth to clean the surface. Dust can hide scratches and make it hard to see your progress. If you leave dust on the wood, it can mix with your finish and ruin the look.
Removing dust between steps also helps your sandpaper work better and keeps your sanding even. You’ll get a more flawless finish and avoid patchy spots.
Pro Tip: Dustless sanding not only keeps your workspace cleaner but also helps you see where you need to sand next.
Before you call it done, check your work. Run your hand over the surface to feel for rough spots or scratches. Look closely for swirl marks, divots, or unsanded areas. The surface should look even, with no shiny or dull patches.
Quality control experts say that a smooth finish means the grain looks consistent and there are no missed spots. Make sure you followed the correct sanding sequence and didn’t round off any sharp edges by over-sanding. Inspecting your work at each stage helps you catch mistakes early and fix them before you move on.
Note: Regular inspection is key to getting a professional result. Take your time and don’t rush the final sanding step.
By following these steps, you’ll master how to sand wood and get results that look and feel amazing. Patience, careful checking, and good sanding habits make all the difference.
Sometimes you do not need to sand the whole surface. Maybe you just want to touch up a small area or smooth out a tiny flaw. In these cases, you can use minimal sanding. This approach saves time and keeps the rest of your project looking sharp.
Here’s how you can handle minimal sanding like a pro:
Pick a fine grit sandpaper, such as 400 or even up to 2500 grit, for gentle touch-ups.
Use micro-abrasive tools, like needle files or small sanding sticks, for tight spots or detailed areas.
Sand only the area that needs it. Do not overwork the rest of the surface.
Clean the spot with a soft brush or tack cloth to remove dust before you move on.
If you plan to finish or paint, make sure the area is dry and free from grease or moisture.
Tip: Polishing or sealing the sanded spot with a clear coat can help blend it in and protect your work.
Minimal sanding works best when you want to fix small scratches or prepare a spot for touch-up paint. Always check the area after sanding to make sure it feels smooth and matches the rest of your project.
When you apply paint, varnish, or polyurethane, you want each layer to look smooth and even. Sanding between coats helps you get that perfect finish. You do not need to sand hard—just a light touch will do.
Follow these steps for best results:
Wait for the first coat to dry completely. The surface should feel firm and not sticky under your thumb.
Use a fine grit sandpaper, like 220 or 320, to sand the surface lightly. This removes dust bumps and helps the next coat stick better.
Wipe away all dust with a tack cloth or vacuum.
Apply the next coat using the right brush or roller for your finish.
Repeat the process for each layer, always letting each coat dry fully before sanding again.
Note: Always follow the manufacturer’s instructions for drying times and sanding steps. This helps your finish last longer and look more professional.
Sanding between coats gives you a silky-smooth surface and helps your project stand out. You’ll notice the difference every time you run your hand over the finished wood!
Everyone makes mistakes when sanding wood, especially if you are just starting out. Knowing the most common sanding mistakes to avoid can save you time and help you get a smooth, pro-level finish. Let’s look at the biggest trouble spots and how you can fix them.
You might want to save time by jumping from a coarse grit straight to a fine one. This shortcut often leads to trouble. If you skip grits, you may leave deep scratches that show up after staining. Here are some sanding mistakes to avoid:
Skipping the right grit can leave swirl marks or rough patches.
Using sandpaper that is too fine before finishing can close the wood pores, making stain look uneven or causing a “paint on glass” effect.
Some woods, like birch or maple, need careful grit progression for the best finish.
Old or worn sandpaper can also cause color and adhesion problems.
Tip: Always move up one grit at a time and check your work between steps. If you want a super-smooth finish, stop at 220 or 320 grit, but don’t go higher unless your finish calls for it.
Sanding against the grain is one of the most common sanding mistakes. When you sand in the wrong direction, you create scratches that are hard to hide. Studies show that sanding against the grain increases roughness and surface damage. You will see more defects, especially after you apply stain or paint.
Always sand with the grain. This keeps the surface smooth and helps your finish look even.
Pressing down too hard with your sander or sandpaper can cause dips and uneven spots. You might also see swirl marks or “pigtails” in the wood. These marks show up even more with shiny or metallic finishes. To avoid this, let the sandpaper do the work and use light, even pressure.
It’s easy to think more sanding is always better. But sanding too much can round off edges or burnish the wood. This makes it hard for stain or finish to stick. Over-sanding can also lighten the color and make the surface look patchy.
If you notice the wood getting shiny or slick, it’s time to stop.
Uneven sanding happens when you miss spots or use different pressure in different areas. This can lead to blotchy finishes and visible scratches. You might see swirl marks or rough patches after painting. Here are some sanding mistakes to avoid:
Not replacing loaded or worn sandpaper.
Using inconsistent sanding patterns.
Forgetting to check your work as you go.
For the best results, use fresh sandpaper, sand in even strokes, and inspect your work often.
By watching out for these sanding mistakes to avoid, you can get a smoother, more professional finish every time.
Swirl marks can ruin the look of your project. You might see them after you finish sanding, especially if you use a power sander. To avoid these marks, always use high-quality sandpaper. Brands like Mirka, Klingspor, and 3M Cubitron work well. Cheap sandpaper can leave scratches, no matter how careful you are.
Follow a proper grit sequence. Do not skip from a coarse grit straight to a fine one. Try moving from 80 to 150, then to 180. If you jump to 220 too soon, you may leave deep scratches behind. Start your sander on the wood, not in the air, and move it slowly. Lift it off with a smooth, sweeping motion. Smaller orbit sanders also help reduce swirl marks.
Here’s a quick look at expert advice:
| Tip | What to Do |
|---|---|
| Sandpaper Quality | Use top brands for fewer swirl marks |
| Grit Progression | Move up in steps: 80 → 150 → 180 |
| Sander Technique | Start and stop on the wood, move slowly, sweep off at the end |
| Orbit Size | Choose smaller orbit sanders for a finer finish |
Pro Tip: Take your time. Rushing through wood sanding often leads to swirl marks that are hard to fix later.
Dust can make a mess and even ruin your finish. It also makes sanding less safe. Always use a vacuum system or a shop vac to collect dust as you work. Blow off the wood between grit changes to remove stray particles. This keeps your sandpaper clean and helps you see your progress.
Wear a dust mask or respirator for sanding dust protection. Fine dust can harm your lungs, so do not skip this step. Clean your workspace often. Wipe the wood with a tack cloth before you move to the next grit or apply a finish.
Keeping dust under control helps you get a smoother, cleaner result every time you sand.
Consistency is key in wood sanding. Use the same pressure and motion across the whole surface. Check your sandpaper often. If it looks worn or clogged, replace it. Always sand with the grain, not against it. This habit helps you avoid scratches and keeps the surface even.
If you use more than one sander, keep each one set up for a specific grit. This saves time and prevents grit contamination. Inspect your work as you go. Run your hand over the wood to feel for rough spots or missed areas.
Consistent sanding gives you a professional finish and makes your project stand out.
You have finished your sanding steps, but you want to make sure your project looks perfect. Now is the time for a careful final inspection. Grab a bright light or move your wood near a window. Look at the surface from different angles. You might spot tiny scratches or missed spots that you did not see before.
Run your hand over the wood. Your fingers can feel rough areas that your eyes might miss. If you find any, go back and do a quick final sanding with your finest grit. This step helps you catch small flaws before you add paint or stain. You want every part of your project to feel smooth and even.
Tip: Use a clean, dry cloth to wipe away dust after your final sanding. This helps you see the true surface and makes sure you get a smooth finish.
You want your project to look like a pro made it. The secret is patience and attention to detail. After your final sanding, check all the edges and corners. These spots often get missed. Lightly sand them if needed.
Here are some quick tips for a smooth finish:
Always sand with the grain.
Use even pressure.
Remove dust between each sanding step.
Inspect your work after every grit change.
A smooth finish makes your wood look and feel amazing. It also helps paint or stain go on evenly. If you take your time with the final sanding, you will see a big difference in your results. Your friends and family will notice the quality, too!
Remember: The best woodworkers always spend extra time on the final sanding. That’s how they get a smooth finish every time.
You now know how to sand wood like a pro. Start with good prep, pick the right tools, and follow each sanding step. Studies show that using the correct grit and technique leads to smoother surfaces and better project results. For a final check, try these steps:
Look at your wood under bright light.
Feel the surface for rough spots.
Keep notes to track what works best.
Use fine sanding or polishing for extra shine.
Keep practicing, and your skills will only get better!
Run your hand over the wood. If it feels smooth and you don’t see any shiny or rough spots, you’re good. Use a bright light to check for scratches. If you spot any, sand a little more.
You can reuse sandpaper if it still feels rough and isn’t clogged with dust. Tap it gently or brush it off to clean. If it looks worn or smooth, grab a fresh piece for better results.
Swirl marks usually mean you used the wrong grit or pressed too hard. Go back to a finer grit and sand lightly with the grain. Always clean off dust before switching grits.
Yes, you should sand lightly between coats. This helps each layer stick better and removes bumps. Use fine sandpaper, like 220 grit, and wipe away dust before adding the next coat.
Power sanders work great for big, flat surfaces. For small parts or details, hand sanding gives you more control. Try both and see what feels best for your project.


