Views: 211 Author: Site Editor Publish Time: 2025-06-12 Origin: Site


Mortise-and-tenon joints are one of the oldest ways to connect wood. These joints are found in furniture, cabinets, and big wooden structures. A mortise is a square or rectangular hole in one wood piece. A tenon is a part that sticks out from another wood piece. The tenon fits tightly into the mortise, joining the two pieces securely. This method doesn’t need nails or screws. Many woodworkers like it because it’s strong and lasts a long time.
These joints are simple but very strong. First, you cut a mortise in one wood piece. Then, you shape a tenon on the other piece. The tenon slides into the mortise, creating a tight connection. Adding glue or wooden pegs can make the joint even stronger. This design spreads weight evenly, keeping the joint stable under pressure. Whether making a chair or a wooden frame, mortise-and-tenon joints give strength and reliability.
Tip: Be precise when making these joints. A loose tenon can weaken the joint and make it less sturdy.
Mortise-and-tenon joints have been important in woodworking for centuries. Ancient Egyptians and Chinese used them in buildings and furniture. Studies show their role in traditional timber construction, helping structures stay strong. For example:
| Study Focus | Description |
|---|---|
| Notched joints | Looked at different notched joints, including mortise-and-tenon joints, to test their strength. |
| Pegged mortise and tenon joints | Studied how oak pegs add strength to timber-frame joints. |
| Dynamic loading behavior | Tested how joints handle weight and movement in real-life situations. |
These joints were key in old architecture because they were strong without modern tools. They were used in timber framing and furniture, showing their usefulness and lasting value.
Mortise-and-tenon joints have been vital in woodworking worldwide.
Research shows they make wooden structures stronger and more durable.
Their ability to handle heavy loads makes them great for furniture and big timber projects.
The mortise is the hollow part of this joint. It is a hole cut into one wood piece to hold the tenon. Mortises are usually square or rectangular for a tight fit. Tools like chisels, drills, or routers can make a mortise.
Precision is very important when cutting a mortise. A bad mortise can weaken the joint. First, mark the size of the mortise on the wood. Then, carefully remove the wood inside the marked area. The mortise depth should match the tenon length for a secure fit.
The mortise keeps the tenon in place and stops movement. This makes the joint strong and stable. Mortises are key in furniture and timber framing, where strength matters.
| Component/Aspect | Description |
|---|---|
| Mortise | A hole cut into one wood piece to hold the tenon. Usually square or rectangular. |
The tenon is the part that sticks out in this joint. It is shaped to fit tightly into the mortise for a strong connection. Tenons are usually square or rectangular and made at the end of a wood piece.
To make a tenon, cut the wood end to match the mortise size. Use tools like saws or chisels to shape it. The tenon must fit snugly—not too loose or too tight. A loose tenon weakens the joint, while a tight one can split the wood.
The tenon’s size depends on the mortise. A good tenon handles weight and stress well. Adding glue or pegs can make the joint even stronger.
| Component/Aspect | Description |
|---|---|
| Tenon | A part sticking out from wood, shaped to fit into the mortise. |
The mortise and tenon work together to make a strong joint. This method has been used for centuries because it is reliable. Learning to make these parts is important for quality woodworking projects.
When using mortise-and-tenon joints, there are different types to know. Each type works best for specific woodworking projects. Here are three common kinds of mortise-and-tenon joints.
A through mortise and tenon is simple and very strong. The tenon goes completely through the mortise, showing on the other side. This type is great for strong projects like timber frames or heavy furniture.
To make this joint, cut a hole through one wood piece. Then, shape the tenon to fit tightly into the hole. The visible tenon can stay plain or be decorated for style.
Tip: Hold the wood steady with clamps when cutting the mortise. A tight fit makes the joint stronger.
This joint is popular because it’s strong and easy to check. You can see if it fits well and adjust if needed.
A blind mortise and tenon hides the tenon inside the mortise. Unlike the through type, the tenon doesn’t stick out. This is perfect for furniture or cabinets where looks matter.
To make this joint, cut a mortise that doesn’t go all the way through. Shape the tenon to fit inside without sticking out. This design looks clean and stays strong.
Note: Measure carefully for blind joints. A bad fit can weaken the joint and ruin the look.
This joint is great for combining strength with a neat appearance. It’s ideal when you want the joint to stay hidden.
The wedged mortise and tenon uses wedges for extra strength. The tenon goes into the mortise, and wedges are added to lock it in place.
This type is good for outdoor projects or heavy furniture. The wedges stop the tenon from loosening, even under heavy use.
To make this joint, cut the mortise and shape the tenon as usual. After inserting the tenon, add wedges to secure it. Wedges can be decorative or just functional.
Tip: Use hardwood wedges for better durability. Softwood wedges might weaken over time.
The wedged mortise and tenon is strong and long-lasting. It keeps the joint tight, even with frequent use.
The haunched mortise and tenon is a special joint type. It has a small "haunch" or extra part on the tenon. This haunch stops twisting and makes the joint stronger. It’s great for frames and furniture that need to last.
To make this joint, cut a mortise in one wood piece. Then, shape the tenon with a haunch to fit a shallow groove. The haunch adds more contact area, making the joint stable.
Tip: Measure carefully when cutting the haunch. A bad fit can weaken the joint instead of helping it.
This joint is perfect for things like door frames or tables. It keeps wood straight and reduces stress on the joint. Use this design for projects that need to handle weight and movement.
| Feature | Description |
|---|---|
| Haunch | Extra part on the tenon fitting into a groove. |
| Purpose | Stops twisting and adds strength. |
| Best Use | Frames, furniture, and heavy-duty projects. |
This joint is strong and dependable. It mixes simple joinery with extra support.
The pegged tenon joint uses wooden pegs to hold the tenon in place. These pegs make the joint stronger and stop it from loosening. It’s a favorite for timber frames and long-lasting furniture.
To create this joint, cut the mortise and shape the tenon. Fit the tenon into the mortise, then drill holes through both pieces. Insert wooden pegs to lock the joint tightly.
Note: Use hardwood pegs for better strength. Softwood pegs may wear out and weaken the joint.
This joint works well for outdoor items like pergolas or benches. It stays strong even in bad weather.
| Feature | Description |
|---|---|
| Wooden Pegs | Pegs go through the mortise and tenon to secure it. |
| Purpose | Stops loosening and adds durability. |
| Best Use | Timber frames, outdoor furniture, and heavy-duty projects. |
This joint blends old techniques with modern strength. It’s a great choice for lasting, sturdy connections.
Mortise-and-tenon joints have many benefits for woodworking. They are strong and last a long time. These joints are great for projects that need to hold heavy weight or stay sturdy for years.
One big advantage is their strength. The tight fit between the mortise and tenon keeps the joint secure, even under pressure. This makes them perfect for furniture, wooden frames, and other strong structures.
Another benefit is how nice they look. These joints combine strength with a clean, smooth appearance. They make your project look neat and professional.
You don’t need nails or screws with these joints. Using glue or wooden pegs creates a strong bond without metal parts. This makes them a good choice for traditional woodworking styles.
Tip: Be very careful when making these joints. A tight fit makes them stronger and last longer.
Lastly, mortise-and-tenon joints are flexible. You can use them in many designs, from simple to more detailed types like wedged or pegged joints. This makes them useful for many woodworking projects.
Even with their benefits, mortise-and-tenon joints have some downsides. Knowing these can help you decide if they’re right for your project.
One problem is the time and effort needed to make them. Cutting a good mortise and shaping a matching tenon takes skill and patience. Beginners might find this hard at first.
Another issue is needing special tools. Basic tools like chisels and saws can work, but better tools like routers or mortising machines make it easier. These tools can cost a lot, especially for new woodworkers.
These joints also need exact measurements. If the fit isn’t perfect, the joint can be weak and less durable. You must measure carefully to make sure the mortise and tenon fit well.
Note: Practice can help you get better at making these joints. Start with easy projects to improve your skills.
Lastly, not all wood types work well with these joints. Softwoods can split or wear out, making the joint weaker. Hardwoods are stronger but harder to work with.
Even with these challenges, the benefits of mortise-and-tenon joints are worth it. With practice and good tools, you can make strong and beautiful woodworking projects.
Mortise and tenon joints are important in making furniture. They are used in chairs, tables, beds, and other wooden items. These joints make furniture strong and steady, so it lasts long. The mortise and tenon fit tightly, even with heavy use. This makes them great for furniture like dining tables or benches that hold weight.
You can use this joint to create neat and professional designs. It can stay hidden or be shown as decoration. For example, through mortise and tenon joints give furniture a rustic or classic look. This method helps you make furniture that is both strong and attractive.
Tip: Practice making accurate mortises and tenons. This ensures your furniture fits well and stays strong.
Mortise and tenon joints are also great for timber framing. They are used to build big wooden structures like barns, houses, or pergolas. These joints are strong and handle heavy loads and weather stress.
In timber framing, the mortise and tenon join beams and posts securely. This method has been used for centuries in traditional building styles. It is still popular today because it is reliable and looks timeless. Adding wooden pegs or wedges can make the joint even stronger, keeping the structure solid for years.
Note: Use hardwoods for timber framing. Hardwoods last longer and resist wear better.
Mortise and tenon joints are common in making cabinets. They are used for cabinet frames, doors, and drawers. The tight fit of the mortise and tenon keeps cabinets strong and useful.
This joint is great for cabinetry because it allows clean and precise designs. Blind mortise and tenon joints are often used to hide connections. This gives cabinets a smooth and polished look, perfect for high-quality designs.
Using mortise and tenon joints helps you make cabinets that are both sturdy and stylish. Whether for kitchen cabinets or decorative storage, this joint balances strength and beauty.
Tip: Use clamps to hold pieces steady when assembling the joint. This keeps everything accurate and ensures a snug fit.
Mortise and tenon joints are key for building outdoor items. These joints are strong and can handle tough weather and heavy use. You’ll see them in pergolas, gazebos, garden benches, and fences. They make tight connections, perfect for outdoor projects.
When building outdoors, choose the right wood and joint type. Hardwoods like oak or teak are best since they resist rot and moisture. A wedged mortise and tenon joint works well outside. The wedges keep the joint tight, even in bad weather.
Tip: Use a weatherproof finish on outdoor wood. This protects it and helps the joints last longer.
These joints also make outdoor structures look better. For example, a through mortise and tenon joint adds a rustic style to a pergola or bench. You can leave the tenon visible for decoration or carve it for extra detail.
Using mortise and tenon joints keeps outdoor structures strong and attractive for years. Whether it’s a simple bench or a fancy gazebo, these joints give you the strength you need.
Mortise and tenon joints are used in more than furniture and outdoor items. They are important in making musical instruments like guitars and violins. These joints connect parts securely while keeping good sound quality.
In shipbuilding, these joints have been used for hundreds of years. They join wooden planks and beams, making strong, watertight boats. This old method is still used to fix historic ships or build wooden boats.
You’ll also find these joints in wooden doors, windows, and panels. Blind mortise and tenon joints are common here because they hide the connection for a clean look.
Note: Be precise when working on detailed projects like instruments or doors. Small mistakes can ruin the final product.
Mortise and tenon joints are useful in many areas. Their strength and flexibility make them a great choice for all kinds of woodworking projects.
To make mortise-and-tenon joints, you need key tools. A chisel set is very important. Sharp chisels help carve neat mortises and shape tenons well. Use a mallet with chisels for controlled cutting.
For marking, use a marking gauge and combination square. These tools help draw straight lines for accurate cuts. A saw, like a tenon or dovetail saw, is needed to cut tenons to size.
Power tools can save time. A drill press with a brad-point bit makes mortises faster. A benchtop mortiser is great for frequent joinery. It cuts square mortises easily.
Tip: Keep tools sharp. Dull tools make bad cuts and weak joints.
Using the right bits and attachments makes work easier. A brad-point drill bit is great for mortising. It drills clean holes without wandering. A mortising attachment for a drill press cuts square holes directly.
For regular joinery, try a spiral upcut bit with a router. It removes wood fast and leaves smooth edges. A tenoning jig for a table saw helps shape tenons evenly.
Note: Match bit size to mortise width. Mortise width should be one-third of the wood’s thickness.
Precision is very important for mortise-and-tenon joints. Always cut the mortise first. This lets you size the tenon to fit well. Use a marking gauge to outline the mortise. Keep it at least 3/8" from the edge to avoid splitting.
When shaping the tenon, aim for a snug fit. A loose tenon weakens the joint. A tight one may split the wood. Test the fit often and shave off small amounts if needed.
For deep mortises, make them 1/2 to 2/3 the wood’s width. This gives enough contact for strength. Adding glue or wooden pegs makes the joint even stronger.
Pro Tip: Clamp your wood tightly when cutting. This stops movement and ensures clean cuts.
By using these tools and methods, you can make strong and accurate mortise-and-tenon joints. These skills are key for building durable woodworking projects.
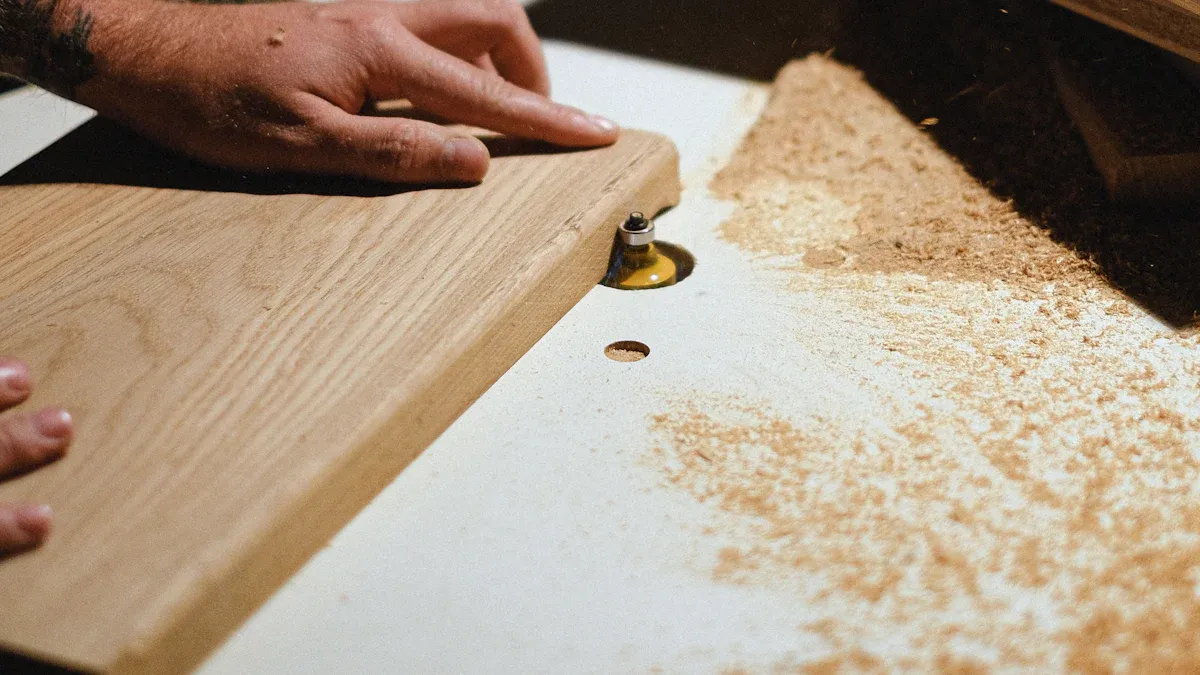
Image Source: pexels
Start by marking the layout for your mortise and tenon. Accurate marking ensures a precise fit and prevents mistakes during cutting. Use a marking gauge to outline the mortise on the wood. Adjust the gauge to match the mortise width, which should be one-third of the wood’s thickness. Draw clear lines to define the mortise’s length and depth.
For the tenon, mark the wood end where it will connect to the mortise. Use a combination square to draw straight lines around the tenon’s edges. These lines guide you when shaping the tenon later.
Tip: Double-check your measurements before cutting. Mistakes in marking can lead to a poor fit and weaken the joint.
Begin with the mortise. Cutting the mortise first allows you to size the tenon to fit snugly. There are several methods to create a clean and precise mortise:
Use a drill press with a brad-point bit to drill overlapping holes along the mortise outline. This method removes most of the wood quickly.
Add a mortising attachment to your drill press for a no-chisel approach. This attachment drills and squares the mortise in one step.
Use a benchtop mortiser for fast and clean mortises. This tool is ideal for frequent joinery work.
After drilling, clean up the mortise edges with a sharp chisel. Remove any rough spots and ensure the mortise walls are smooth. The depth of the mortise should match the tenon length for a secure fit.
Pro Tip: Clamp your wood securely before cutting. This prevents movement and ensures clean, accurate cuts.
Now it’s time to shape the tenon. Start by setting up your tools and using scrap test pieces to check your cuts. The tenon must fit snugly into the mortise without being too tight or too loose.
Here are three reliable methods for cutting tenons:
Use a table saw with a dado set for quick and consistent tenon cuts. Adjust the blade height to match the tenon thickness.
Create a shop-made jig for cutting tenons vertically on the table saw. This jig helps you achieve precise cuts.
Use a bandsaw for smooth tenon cuts, especially for larger wood pieces.
After cutting, test the tenon’s fit in the mortise. Trim any excess wood with a chisel to refine the shape. The tenon should slide into the mortise snugly, with no gaps.
Note: Avoid forcing the tenon into the mortise. A tight fit is essential, but excessive pressure can split the wood.
By following this step-by-step process, you can create strong and accurate mortise-and-tenon joints for your woodworking projects.
Test fitting checks if the mortise-and-tenon joint fits well. This step helps find problems with size or alignment. Start by sliding the tenon into the mortise. It should fit snugly—not too loose or tight. A good fit makes the joint strong.
If the tenon doesn’t fit, adjust it carefully. Use sandpaper or a chisel to remove small bits of wood. For the mortise, smooth rough edges with a sharp chisel. Keep testing until the joint feels secure and fits perfectly.
Tip: Hold the wood steady with clamps while adjusting. This avoids mistakes and keeps cuts precise.
Check the joint’s alignment. The mortise and tenon must meet at the right angle. Misaligned joints can weaken the structure and look bad. If there’s an issue, recheck your markings and fix it.
Also, check the mortise depth. The tenon should sit flush or slightly below the surface. This keeps the joint stable under pressure.
Taking time to test fit prevents problems later. It ensures the joint is strong and ready for assembly.
Glue-up and assembly make the mortise-and-tenon joint complete. First, spread wood glue on the mortise and tenon. Use a brush to apply the glue evenly. Don’t use too much glue, as it can spill out and make a mess.
Carefully insert the tenon into the mortise. Make sure it fits tightly and lines up correctly. Use clamps to hold the pieces together while the glue dries. Tighten the clamps enough to secure the joint but not so much that the wood gets damaged.
Pro Tip: Place scrap wood between the clamps and your project. This protects the surface from clamp marks.
For extra strength, add wooden pegs or wedges. Drill holes through the joint and insert pegs to lock it in place. Wedges can also be tapped into the tenon for more security. These steps make the joint stronger, especially for heavy-duty projects.
Let the glue dry completely before removing the clamps. Follow the glue maker’s instructions for drying time. Once dry, check the joint for gaps or misalignment. Sand the surface to remove glue marks and make it smooth.
Glue-up and assembly finish the joint, creating a strong and lasting connection. This step is key for high-quality woodworking results.
Accurate measuring and marking are the foundation of a strong mortise and tenon joint. Start by using high-quality tools like a marking gauge and a combination square. These tools help you draw precise lines for both the mortise and the tenon. For the mortise, scribe its location carefully, ensuring it is centered and straight. Use the marking gauge to define the width, which should typically be one-third of the wood's thickness.
When marking the tenon, outline its dimensions on the end of the wood piece. Draw clear lines around all four sides to guide your cuts. Double-check your measurements to avoid errors that could weaken the joint. Consistency in marking ensures that the mortise and tenon align perfectly during assembly.
Tip: Always mark the mortise first. This allows you to adjust the tenon for a precise fit later.
A snug fit between the mortise and tenon is crucial for a strong joint. The tenon should slide into the mortise without excessive force but remain secure. To achieve this, focus on precision during cutting and shaping. When cutting the mortise, use a chisel or a router to create clean edges and a consistent depth. Smooth out any rough spots to ensure the tenon fits evenly.
For the tenon, saw slightly outside the marked lines and refine the shape with a shoulder plane or sandpaper. Test fit the joint frequently as you work. If the tenon is too tight, shave off small amounts of wood until it fits snugly. Avoid forcing the tenon into the mortise, as this can split the wood.
Pro Tip: Use a dry fit to check the joint before applying glue. This helps you identify and fix any alignment issues.
Proper sizing and cutting sequence play a key role in creating a durable mortise and tenon joint. Begin by determining the size of the mortise. Its width should be about one-third to one-half the thickness of the wood. The depth should be at least half the width of the mortised piece for adequate strength.
Always cut the mortise first. This approach makes it easier to size the tenon to fit. Use a drill press or a mortising machine to remove most of the wood, then clean up the edges with a chisel. For the tenon, use a table saw or a bandsaw to make precise cuts. A tenoning jig can help you achieve consistent results.
Follow these steps for an effective cutting sequence:
Mark the mortise and tenon dimensions clearly.
Cut the mortise using a drill press or chisel.
Shape the tenon slightly oversized and refine it for a snug fit.
Test fit the joint and make adjustments as needed.
Assemble the joint with glue and clamps to ensure alignment.
Note: Proper sizing ensures the joint can handle weight and stress without failing.
Making mortise and tenon joints can be tricky. Avoiding mistakes helps your project stay strong and last longer. Here are common errors and ways to prevent them:
Inaccurate measurements
Measuring wrong makes the mortise and tenon fit poorly. Always check your measurements twice. Use a marking tool to draw clear lines for cutting. Careful measuring saves time and keeps joints strong.
Cutting the tenon first
Cutting the tenon before the mortise can cause mismatches. Start with the mortise first. This lets you shape the tenon to fit perfectly. A tight fit keeps the joint sturdy.
Over-tightening clamps
Clamps pressed too hard can damage wood or misalign parts. Tighten clamps just enough to hold the pieces steady. Use scrap wood under clamps to protect surfaces.
Using dull tools
Dull tools make rough cuts and weak joints. Keep chisels and saws sharp for clean edges. Sharp tools make cutting easier and more accurate.
Choosing softwood
Softwoods like pine can split or wear out fast. Hardwoods like oak or maple are better for strong joints. They last longer and handle weight well.
Skipping test fitting
Skipping a test fit can cause alignment problems later. Always check the tenon in the mortise before gluing. Testing helps you fix issues early.
Tip: Practice on scrap wood first. This helps you learn and avoid big mistakes.
By fixing these mistakes, you can make better mortise and tenon joints. Careful work and good tools lead to strong and professional results.
Mortise and tenon joints are strong, but other options exist. These alternatives can save time or fit different designs. Here are three common choices: dowel joints, biscuit joints, and pocket-hole joinery.
Dowel joints use wooden dowels to join wood pieces. Drill holes in both pieces, add glue, and insert dowels. Align the wood for a strong connection. This method works well for furniture and cabinets.
Making dowel joints is simple with basic tools like a drill. Beginners find them easy because they don’t need advanced skills. Dowels act like small tenons, fitting tightly into holes. This spreads weight evenly, making the joint sturdy.
Tip: Use a dowel jig for accurate drilling. Misaligned holes weaken the joint.
Dowel joints are versatile and look neat. They are less visible than other joints, giving projects a clean finish.
Biscuit joints use oval-shaped wooden biscuits to join wood. Cut slots in both pieces with a biscuit joiner. Insert biscuits with glue and clamp the wood together. The biscuits expand as glue dries, creating a tight bond.
This method is great for aligning edges, like tabletops or panels. Biscuit joints are quick to make and need fewer tools. Biscuits work like connectors, similar to mortise and tenon joints, but require less effort.
Pro Tip: Pick the right biscuit size. Bigger biscuits add strength; smaller ones suit delicate projects.
Biscuit joints are fast and simple. They aren’t as strong as mortise and tenon joints but work well for light-duty projects.
Pocket-hole joinery connects wood using screws. Drill angled holes (pocket holes) in one piece and attach it to another. A pocket-hole jig helps with accurate drilling and alignment.
This method is easy for beginners and DIYers. It doesn’t need expensive tools or advanced skills. Pocket-hole joinery is strong enough for furniture like tables and cabinets. However, it’s less durable for heavy-duty use.
Note: Cover pocket holes with wood plugs for a cleaner look.
Pocket-hole joinery is quick and practical. It’s great for fast assembly without losing strength.
Loose tenons, also called floating tenons, are a simpler way to join wood. Instead of cutting a tenon into one wood piece, you make two mortises. A separate tenon, usually made from strong hardwood, fits into both mortises. This design connects wood securely and makes the process easier.
To create a loose tenon joint, first cut mortises in both wood pieces. Use a router or drill press for clean and accurate cuts. The mortises must line up perfectly to hold the tenon tightly. Then, shape the tenon from another piece of wood. Make sure it matches the mortise size for a snug fit. Apply glue to the mortises and insert the tenon. Clamp the wood together until the glue dries completely.
Loose tenons have several benefits. They make strong joints easier to create, especially for beginners. You don’t need to carve a tenon directly into the wood, which can be tricky. They are also flexible and work for many projects, like furniture or cabinets. If the tenon breaks, you can replace it, making your project last longer.
However, loose tenons have some downsides. The mortises must align perfectly, or the joint will be weak. You also need to make or buy the loose tenons, which adds extra work. Even with these challenges, loose tenons are popular because they are easy to use and adaptable.
If you want a simple way to make strong joints, try loose tenons. With practice and careful work, you can build durable and professional-looking woodworking projects.
Mortise-and-tenon joints are vital in woodworking for their strength. They make strong connections that hold heavy weight and last long. Their neat look also makes projects both useful and attractive. Making these joints needs careful work and practice for a good fit. Compared to dowel or biscuit joints, mortise-and-tenon joints are stronger and more flexible. Other methods might be quicker, but they don’t match the lasting quality of mortise and tenon.
The tight fit between the mortise and tenon creates a secure connection. This design evenly distributes weight and resists movement. Adding glue or pegs increases strength, making the joint durable for heavy loads and long-term use.
Yes, you can start with simple projects using basic tools like chisels and saws. Practice on scrap wood to improve your skills. Precision is key, so take your time with measuring and cutting.
You need chisels, a mallet, a marking gauge, and a saw. Power tools like a drill press or router can speed up the process. A tenoning jig helps with accurate cuts.
Hardwoods like oak, maple, or walnut are ideal. They resist splitting and wear, ensuring strong joints. Softwoods can work for light-duty projects but may weaken over time.
Measure carefully and mark clearly. Cut the mortise first, then size the tenon to fit. Test the joint before gluing. Keep tools sharp for clean cuts. Practice helps you avoid common errors.
These joints can handle outdoor conditions if you use weather-resistant wood like teak or cedar. Apply a protective finish to prevent moisture damage. Wedged or pegged joints add extra durability.
Yes, through mortise-and-tenon joints can show the tenon for a rustic or classic look. You can carve or shape the tenon for added style. Decorative joints combine strength with visual appeal.
The time depends on your skill level and tools. Beginners may take longer to measure and cut accurately. Using power tools like a mortising machine speeds up the process.


